Creating Audience Segments
Segment is an intelligent, saved audience filter that permanently organizes your members based on shared characteristics. Segments are deeply dynamic—they calculate automatically in real time. If a completely new member signs up tomorrow and matches the exact criteria of your segment, they are instantly pulled into that specific list.
1. How to Create a Segment
You can build segments to target extremely specific subsets of your audience. The system provides two effortless ways to spin one up:
Method A: From an Active Filter (Recommended) If you are already browsing your main Members table and have structured a complex query:
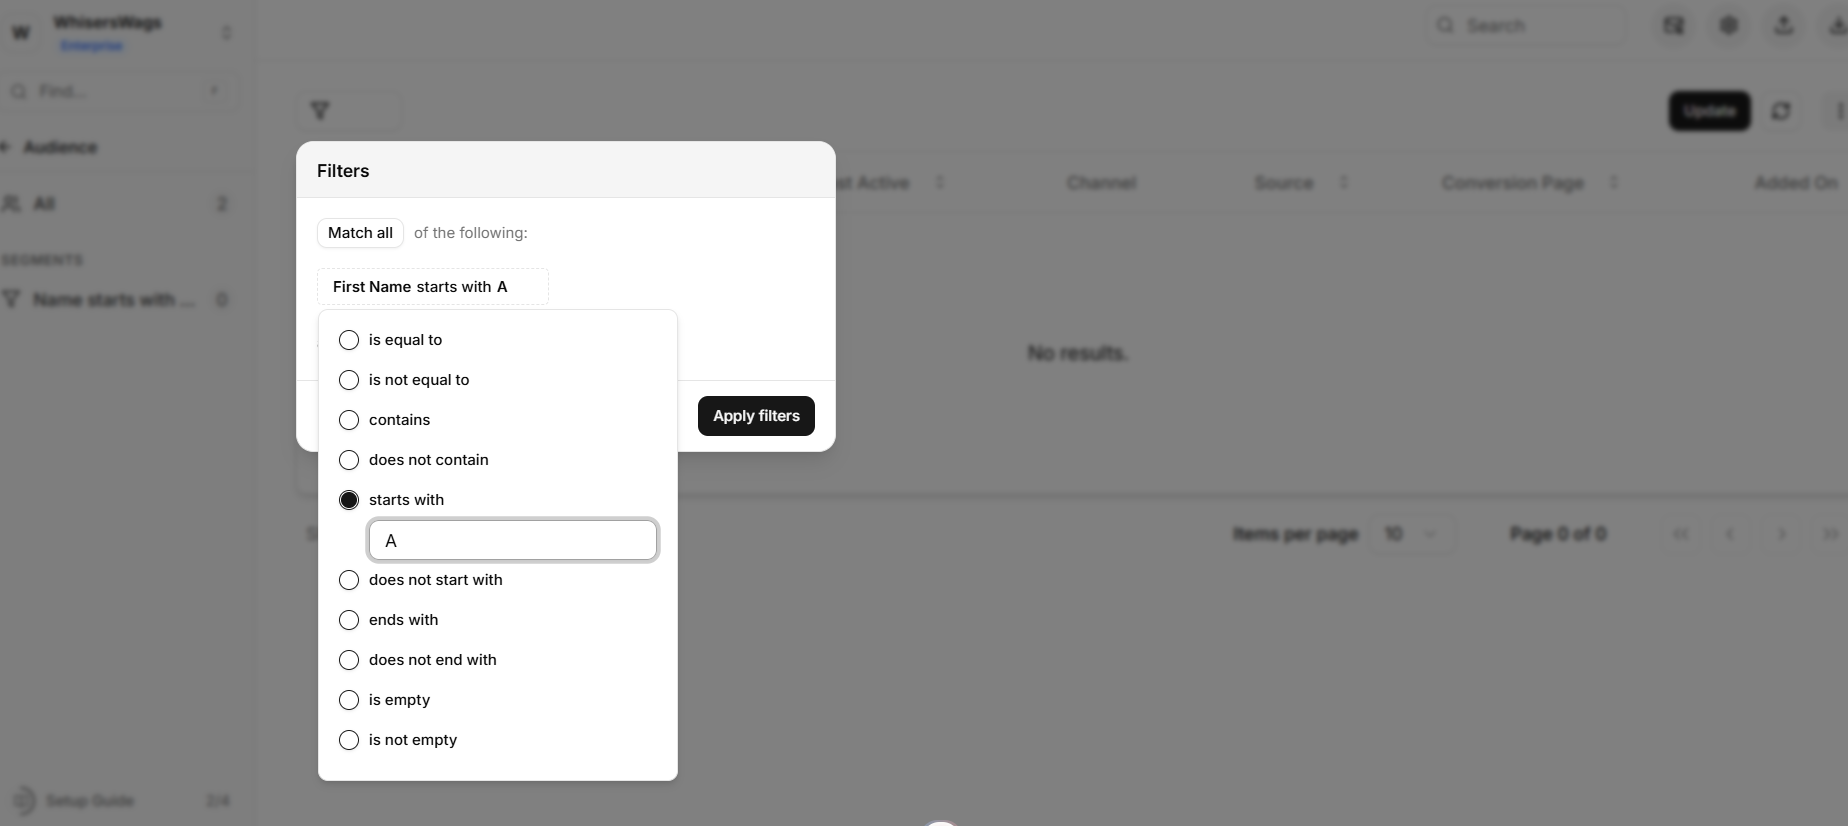
Apply your desired rules using the Filters menu on the main Audience table (e.g., Name starts with “A”).

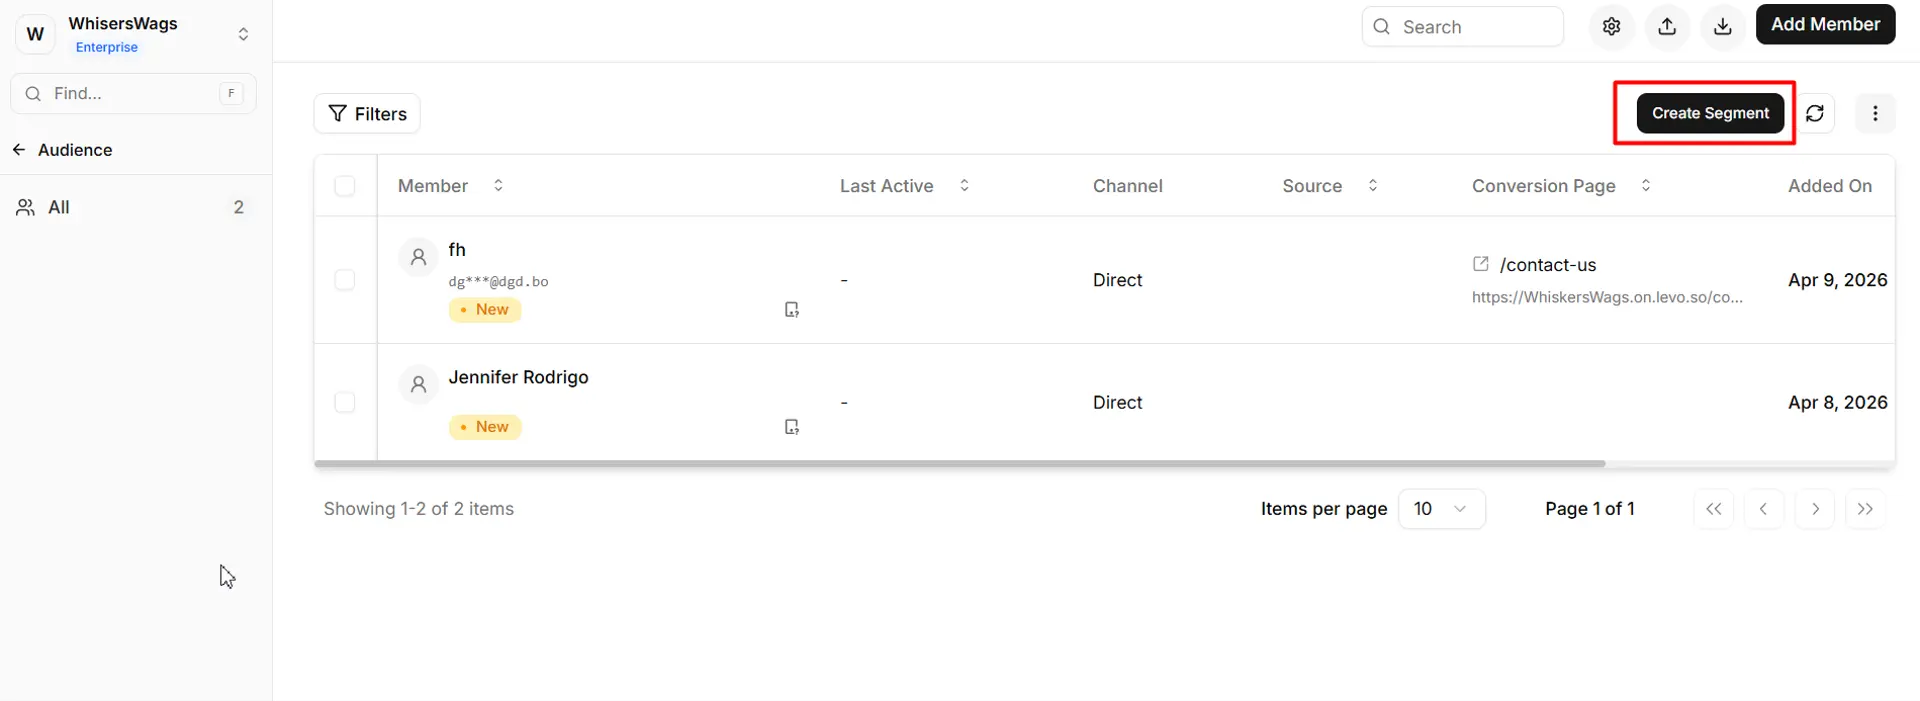
Click the black Create Segment button located in the top-right corner of the screen.
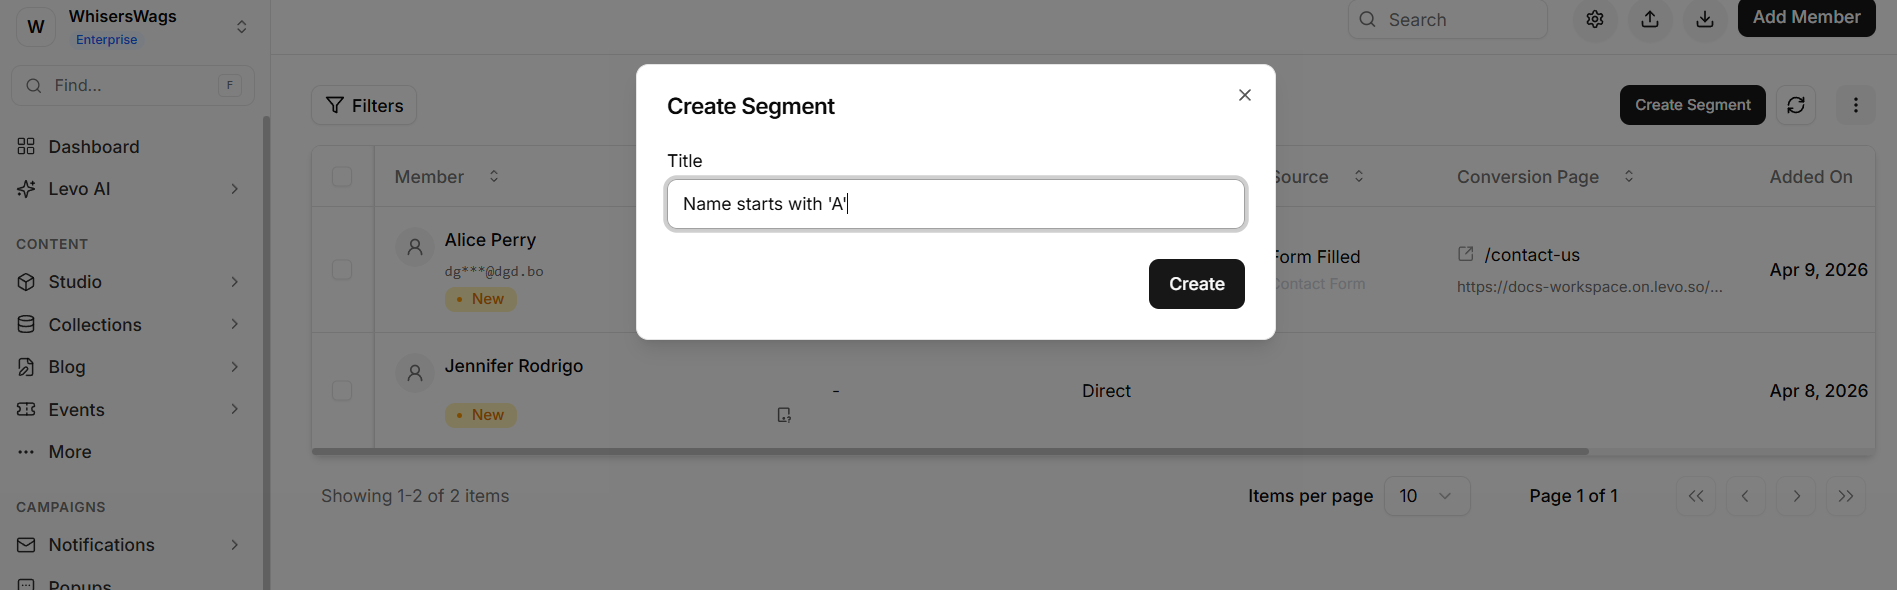
In the modal that appears, provide a clear, descriptive name for your new segment (e.g., “Users with Names Starting with A”).

Click Save. The segment will now appear permanently pinned in your left sidebar.
Method B: From Scratch
Click the + (New) icon next to Segments in the left sidebar, or simply click Create Segment from the main dashboard when no filters are active.
The segment builder modal will open. Assign a name to your segment.
Manually configure your filter rules directly inside the interface using AND/OR logic to stack multiple conditions.
Click Save to instantly generate and populate the segment.
2. Advanced Segment Filter Rules
Segments share the exact same powerful query builder found in the main members table. You can combine multiple conditions across extensive property categories, including:
Account Status: Pending, Approved, Rejected
Sign-up Flow: Target users who joined before, after, between dates, or within the last N days.
Activity Recency: Target users based on their Last Active timestamp.
Geography: Filter by the exact Country or City they signed up from.
Acquisition Blueprint: Target by Sign-up Source (Form, Dashboard, Automated) or Auth Method (OTP, Password, Google, Magic Link).
Custom Data: Filter against any proprietary, workspace-specific custom fields you have established for your site.
3. Managing Your Segments
Viewing Data: Select any segment from your left sidebar. The main table interface will instantly modify to display only members matching that logic. All standard table capabilities (Search, Sort, Bulk Approval, Export) function identically within this segmented view!
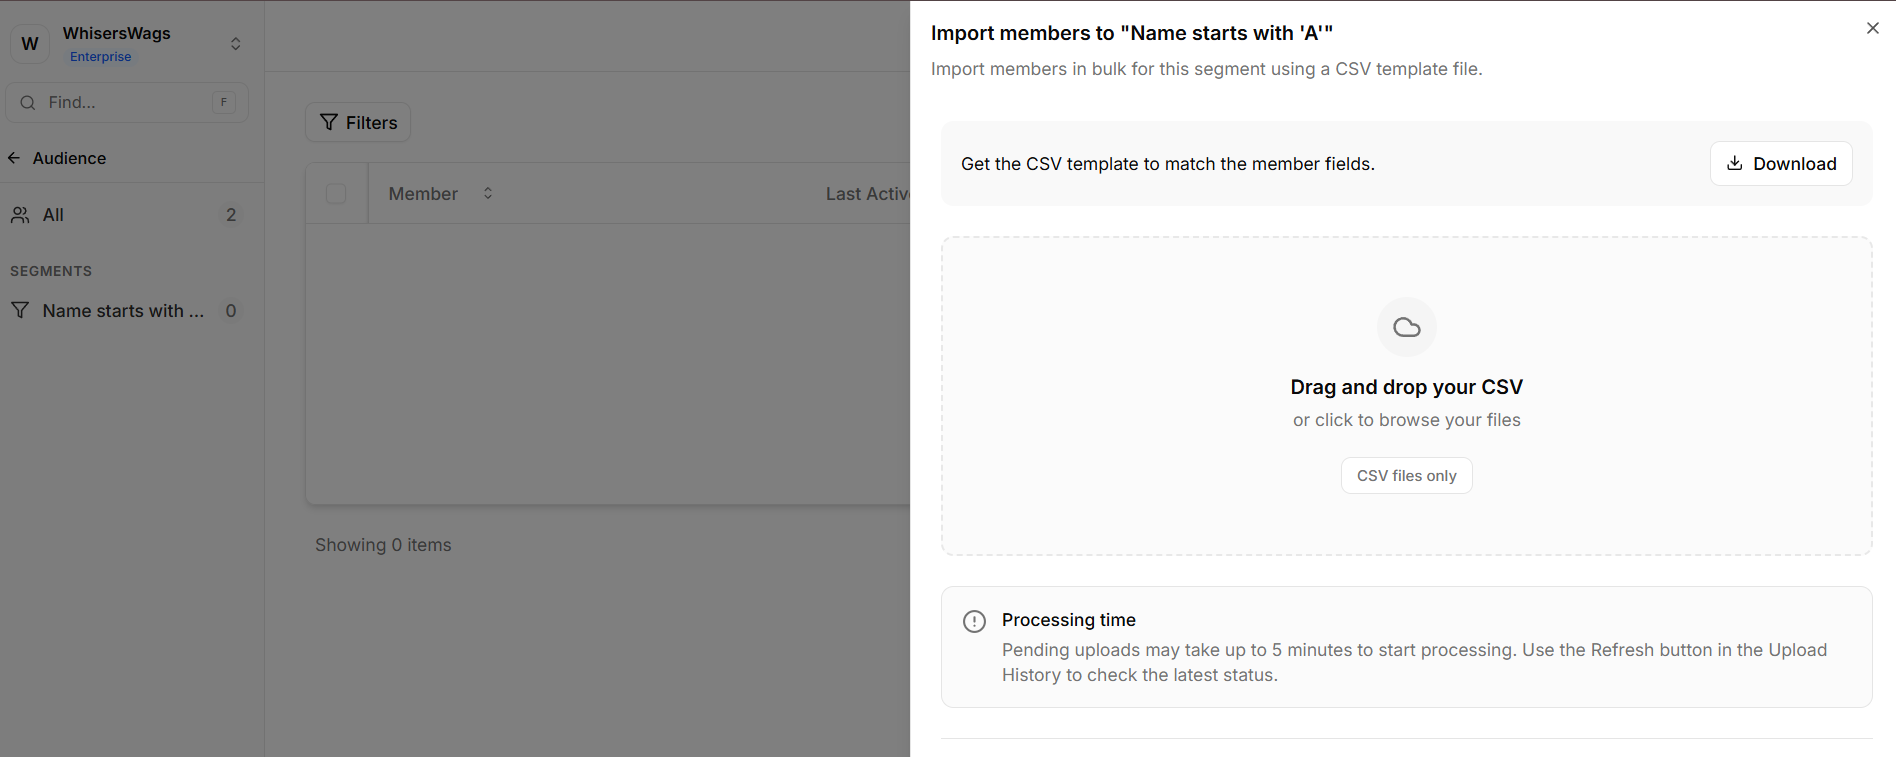
Direct CSV Importing: You can upload a list directly into a specific Segment. Navigate to the Segment, open the Import drawer, and upload your CSV. Levo will intelligently create or merge those users and ensure they drop right into the segment.
Editing Rules: Need to adjust your targeting? Navigate to the segment, open the action menu (three dots), and click Edit. You can rename it or alter the core filter logic; the member list will seamlessly re-calculate.
Safe Deletion: Choose Delete from the segment action menu. (DevRel Note: Deleting a segment simply destroys the saved filter logic itself. It does not delete the actual member accounts trapped inside it—your users remain completely safe in your main 'All Members' list!)