
Managing Attendees & Bookings
Table of Contents
Every completed registration generates a Booking containing one or more Attendees, displaying who is attending, payment details, ticket categories, and check-in confirmation.
Viewing Attendees
Access the Attendees tab within an event to see individual attendee information arranged in rows. Each entry displays:
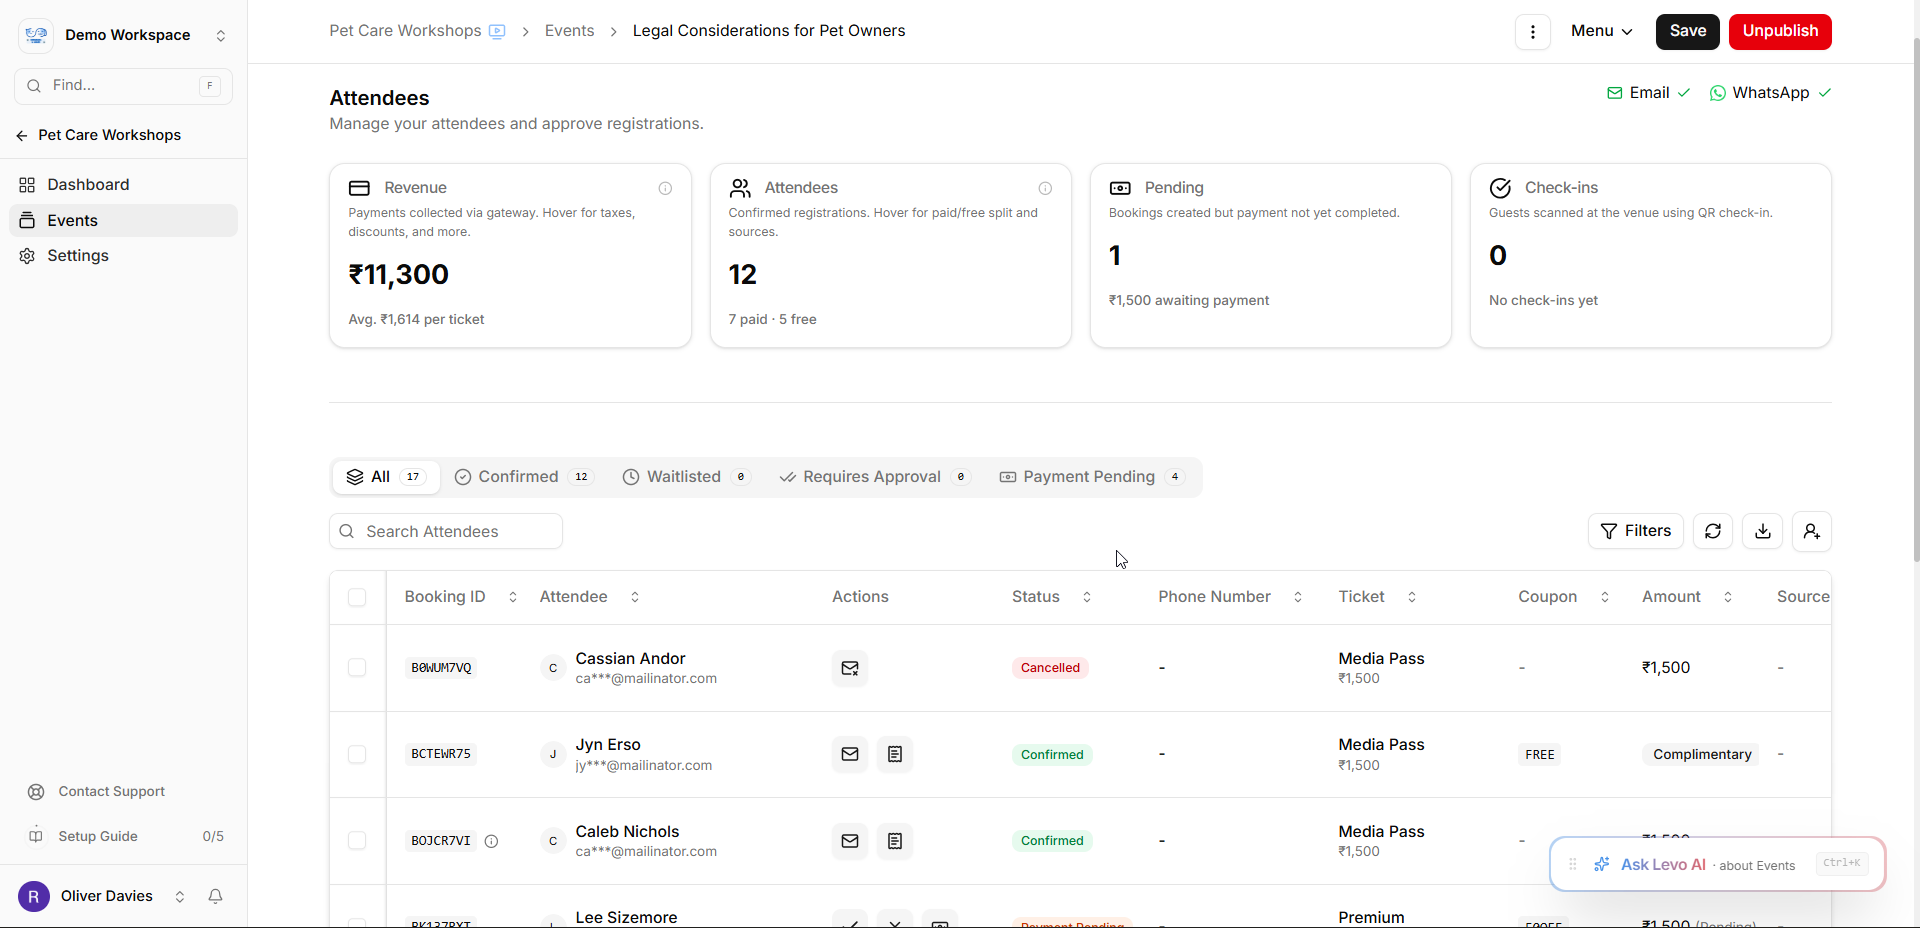
Booking ID — The unique booking reference ID (with an indicator if the attendee has checked in).
Attendee — The participant's name, avatar, email address, and organization.
Status — The attendee's registration status (Confirmed, Payment Pending, Requires Approval, Waitlisted, Not Approved, or Cancelled).
Phone Number — The attendee's contact number (when available).
Ticket — The selected ticket category and its price.
Coupon — The coupon code used (if applicable).
Amount — The total payment amount.
Source — How the booking was registered (Public, Manual, or CSV import).
Booked At — The timestamp of the registration.
Bookings vs Attendees
A Booking represents the transaction itself — one person purchasing tickets. Multiple attendees can exist within a single booking; for example, someone buying three tickets might register themselves and two colleagues.
An Attendee is an individual participant. Each person receives:
Unique QR code for check-in purposes
Personal name and contact information
Specific ticket assignment
Booking Details
Selecting any attendee reveals the booking detail view containing:
Booking Information
Booking ID — The unique booking reference ID (with a click-to-copy button).
Payment Status — Visual badges indicating booking status (e.g. Confirmed, Payment Pending) and payment status (Paid, Unpaid).
Billing Details — Customer name, billing address, and tax IDs (when supplied).
Payment Breakdown — Aggregated line items, applied discount totals (when a coupon is used), tax and charge breakdowns, and the grand total.
Payment Link — Quick actions to "Copy Link" or "Send Link" for unpaid bookings.
Payment History — A chronological log of payment transactions (provider, status, and transaction reference).
Timeline — Timestamps of when the booking was submitted, confirmed, and last updated.
Customer Profile — Displays the primary booker's name, avatar, reducted email, and phone number with a link to their audience profile.
Invoice — A dedicated section that displays the generated invoice file name and a Download button to open the invoice PDF in a new tab (shows "Not yet generated" if the invoice is still pending).
Attendee List
Names, emails, ticket types, and individual check-in statuses for all attendees in the booking.
QR Code
Each booking has a unique QR code. When scanned at the event, it pulls up all attendees in that booking for check-in.
Invoice
PDF download link (when generated) containing complete booking and payment details.
Approval-Required Tickets
When a ticket type has "Requires Approval" enabled, registrations enter a Requires Approval state (visible with a blue "Requires Approval" badge in the Attendees tab) or a Waitlisted state (visible with an amber "Waitlisted" badge).
To process these registrations:
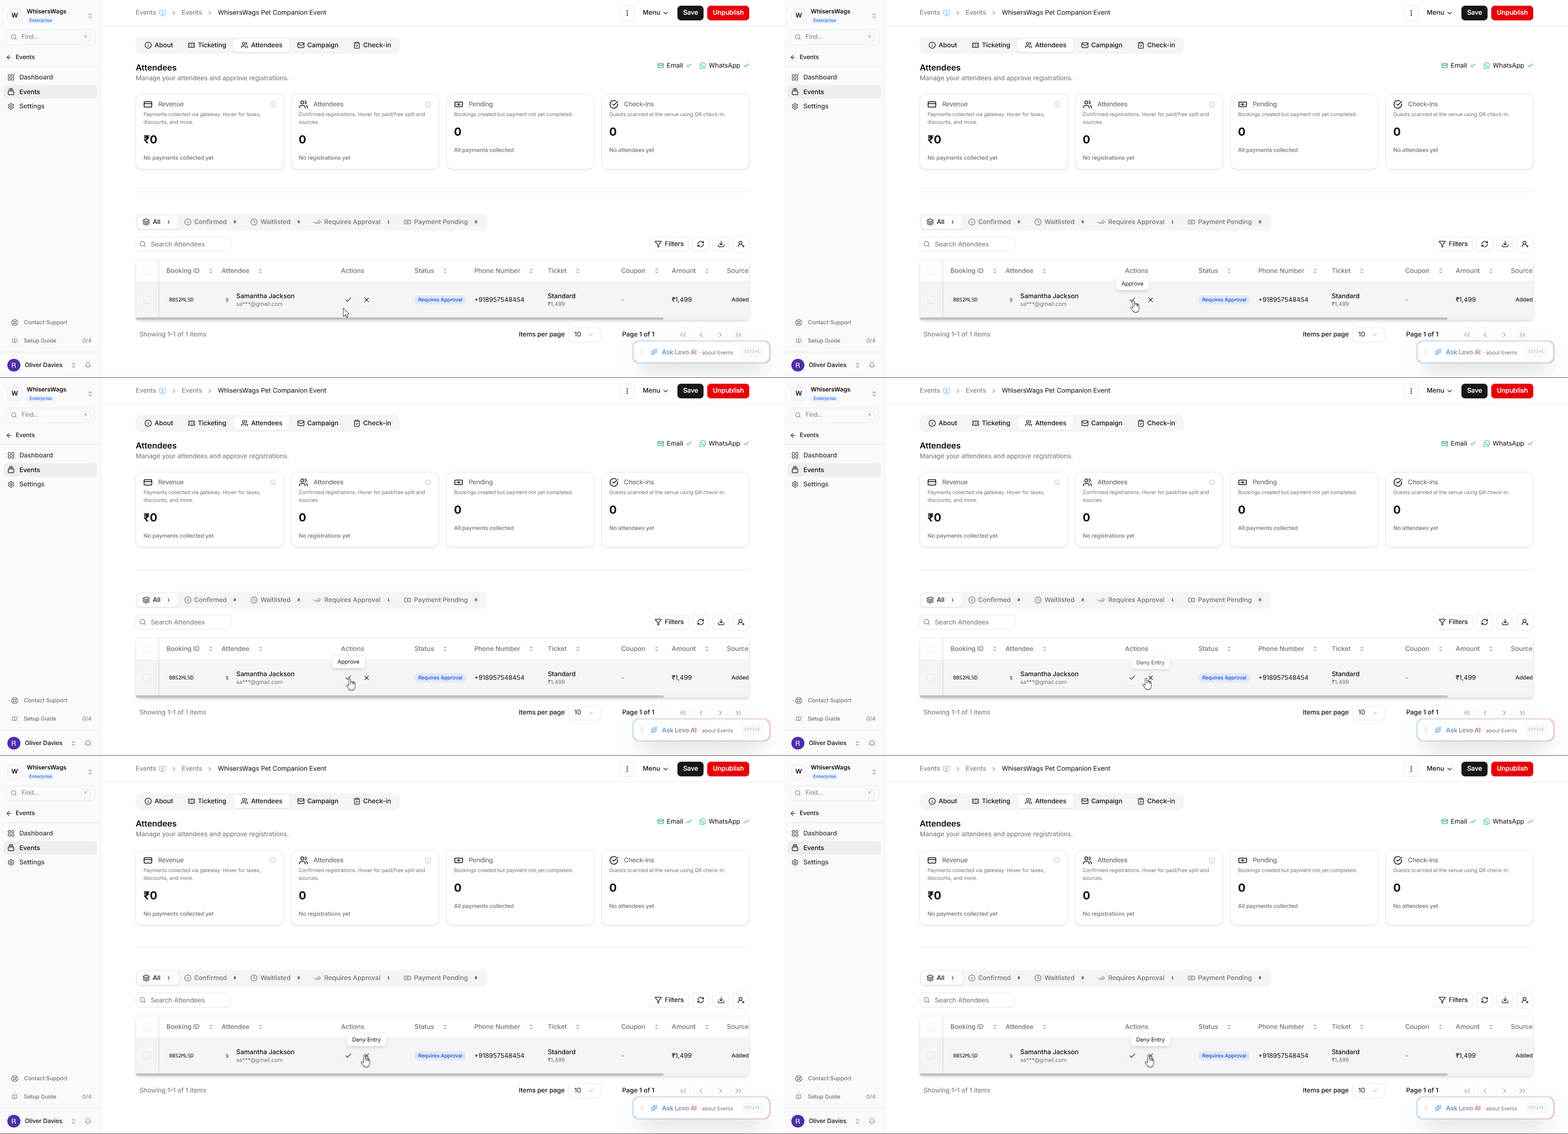
Locate the attendee in the Attendees table.
In the Actions column for that row, click the Approve button (check icon) to confirm the booking, or click the Deny Entry button (X icon) to reject it.
Approved attendees move to a Confirmed status and receive their confirmation email with their ticket and check-in QR code. Rejected registrations are moved to a Not Approved status.
Filtering and Searching Attendees
The search bar allows you to quickly locate attendees by name, email, or mobile number.
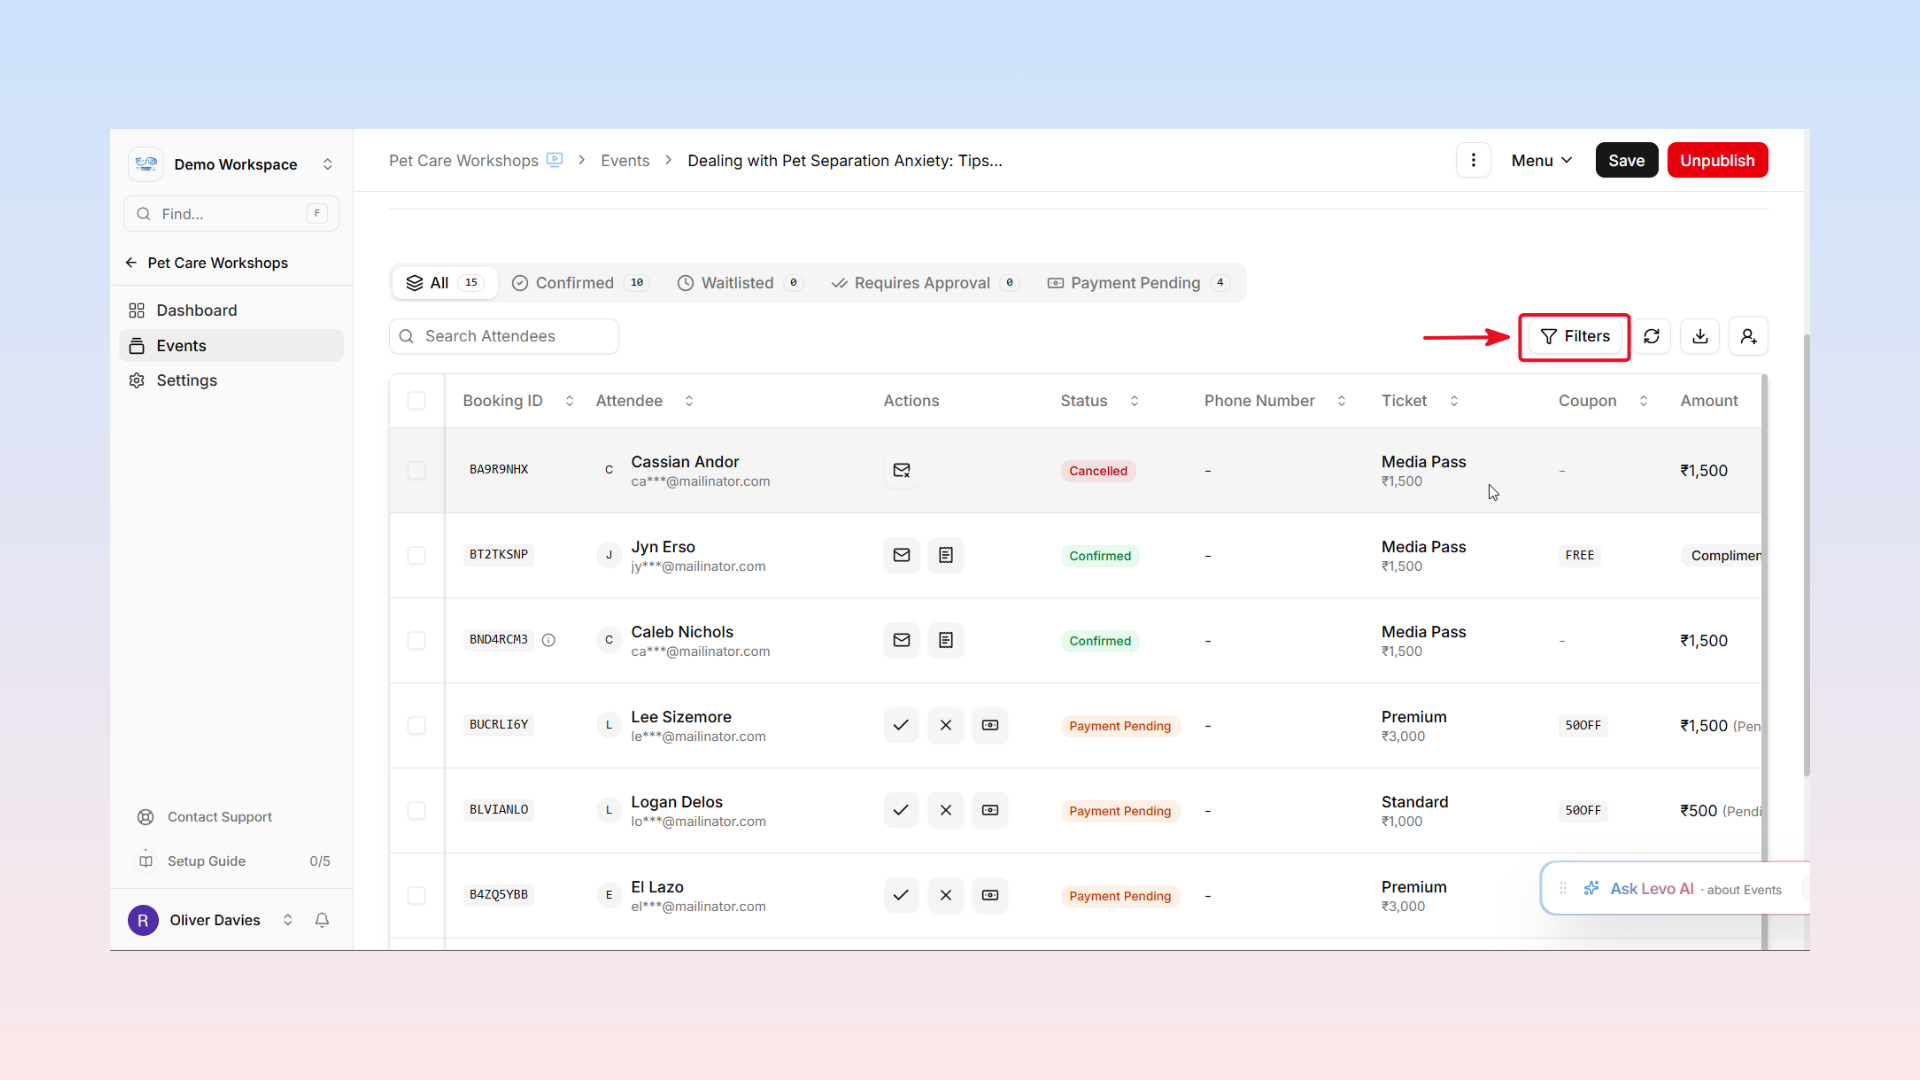
To filter the list:
Status Tabs — Click the tabs at the top of the table to view attendees by status: All, Confirmed, Waitlisted, Requires Approval, or Payment Pending.
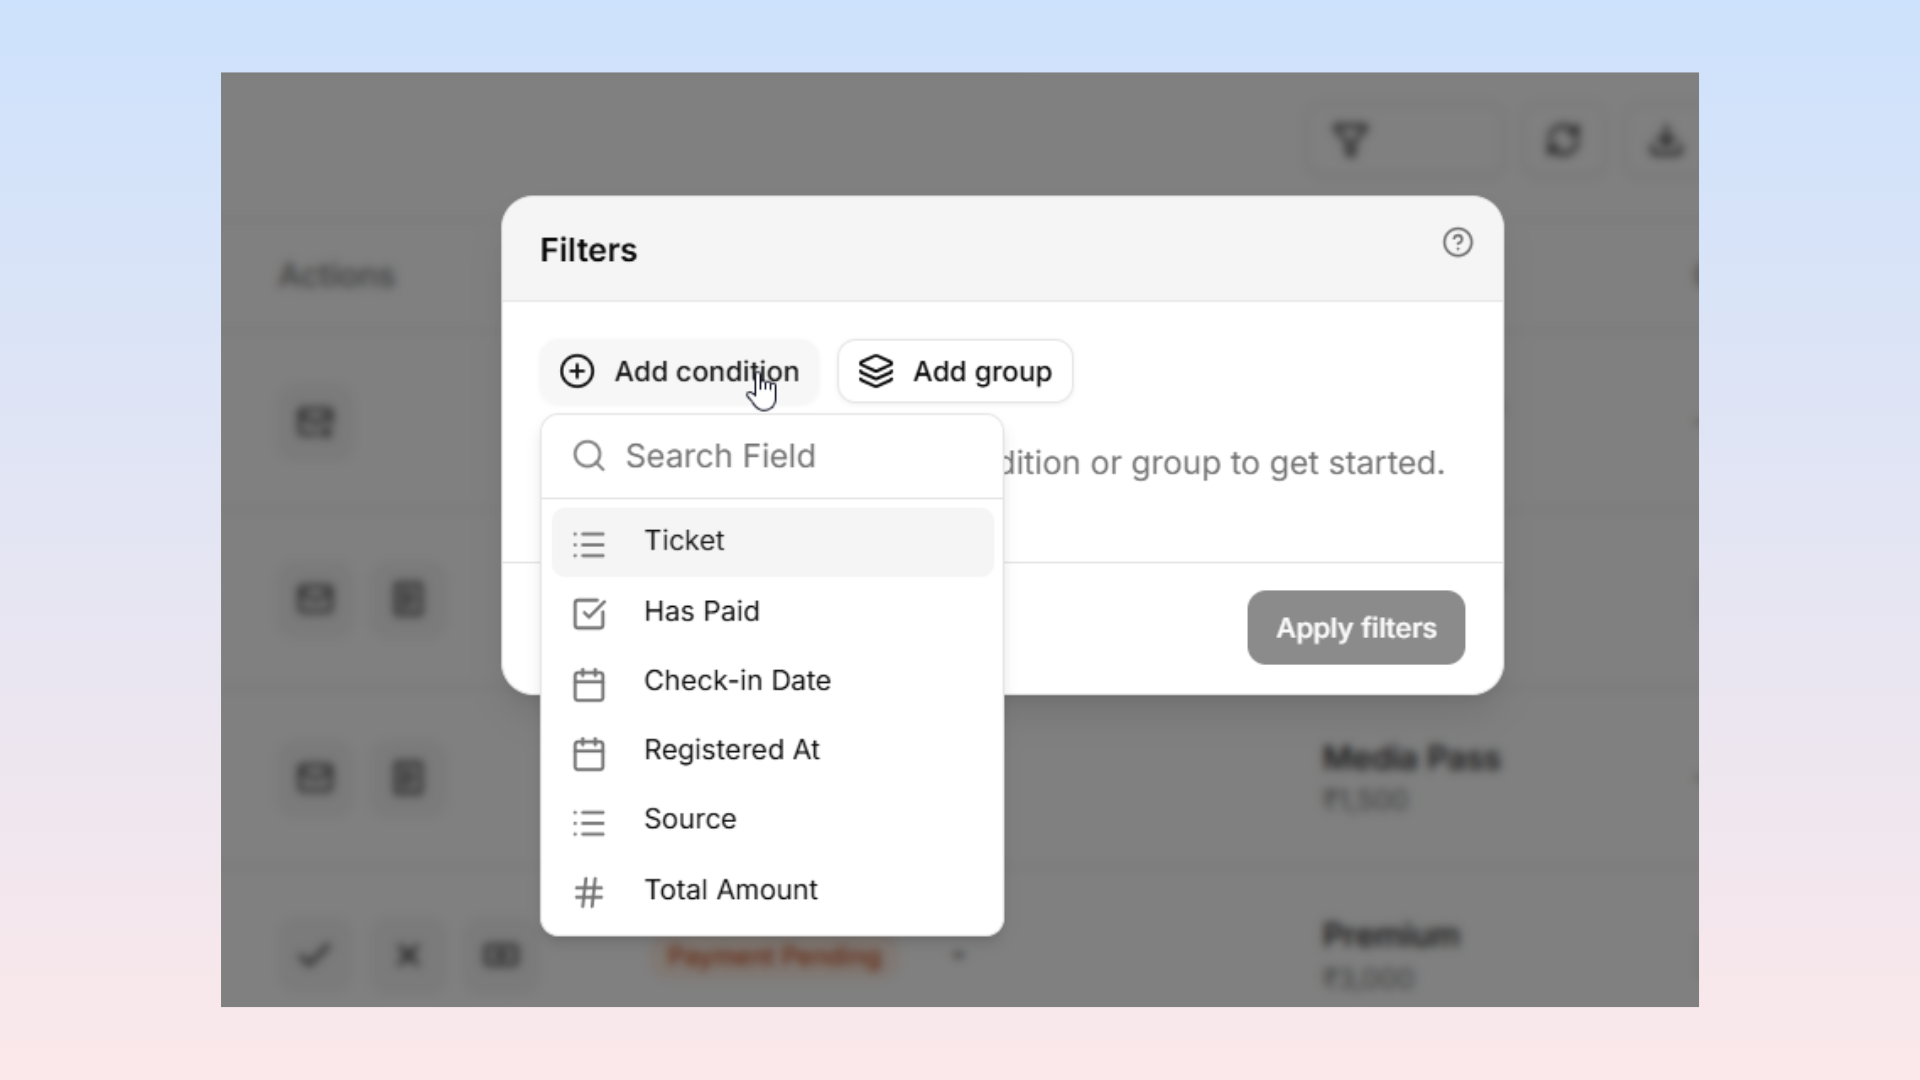
Advanced Filters — Click the filter icon next to the search bar to apply advanced criteria (such as registered ticket types, registration dates, booking sources, and specific custom form fields).
Exporting Attendees
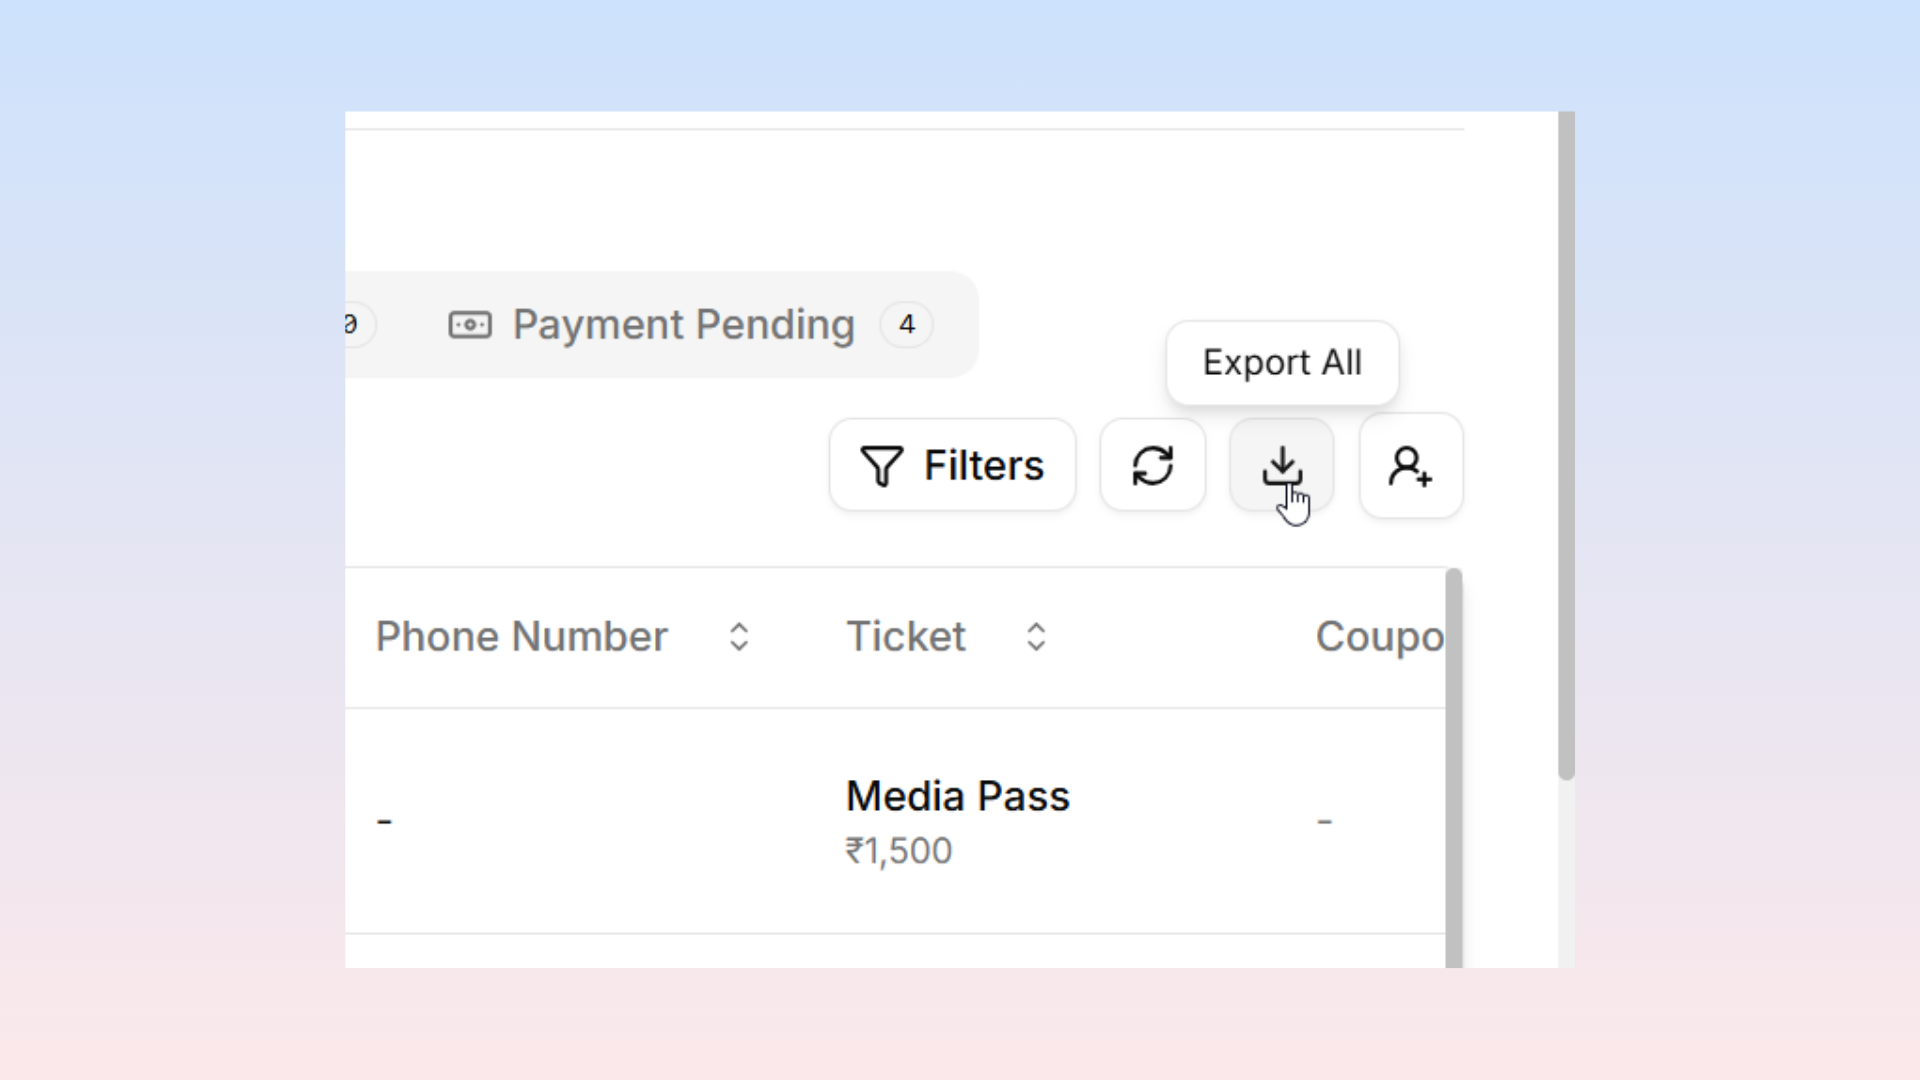
Click the Export All button (download icon) in the top-right toolbar next to "Add manually" to download the complete attendee list as a CSV file. This is useful for:
Staff distribution at the door
Backup check-in lists for printing
Post-event reporting and analysis
The CSV export contains attendee name, email, mobile, ticket type, booking status, payment status, check-in timestamp, and registration timestamp.
Cancellations
To cancel one or more bookings:
Check the selection boxes next to the attendees in the table.
Click the Selected Actions dropdown button at the top of the list.
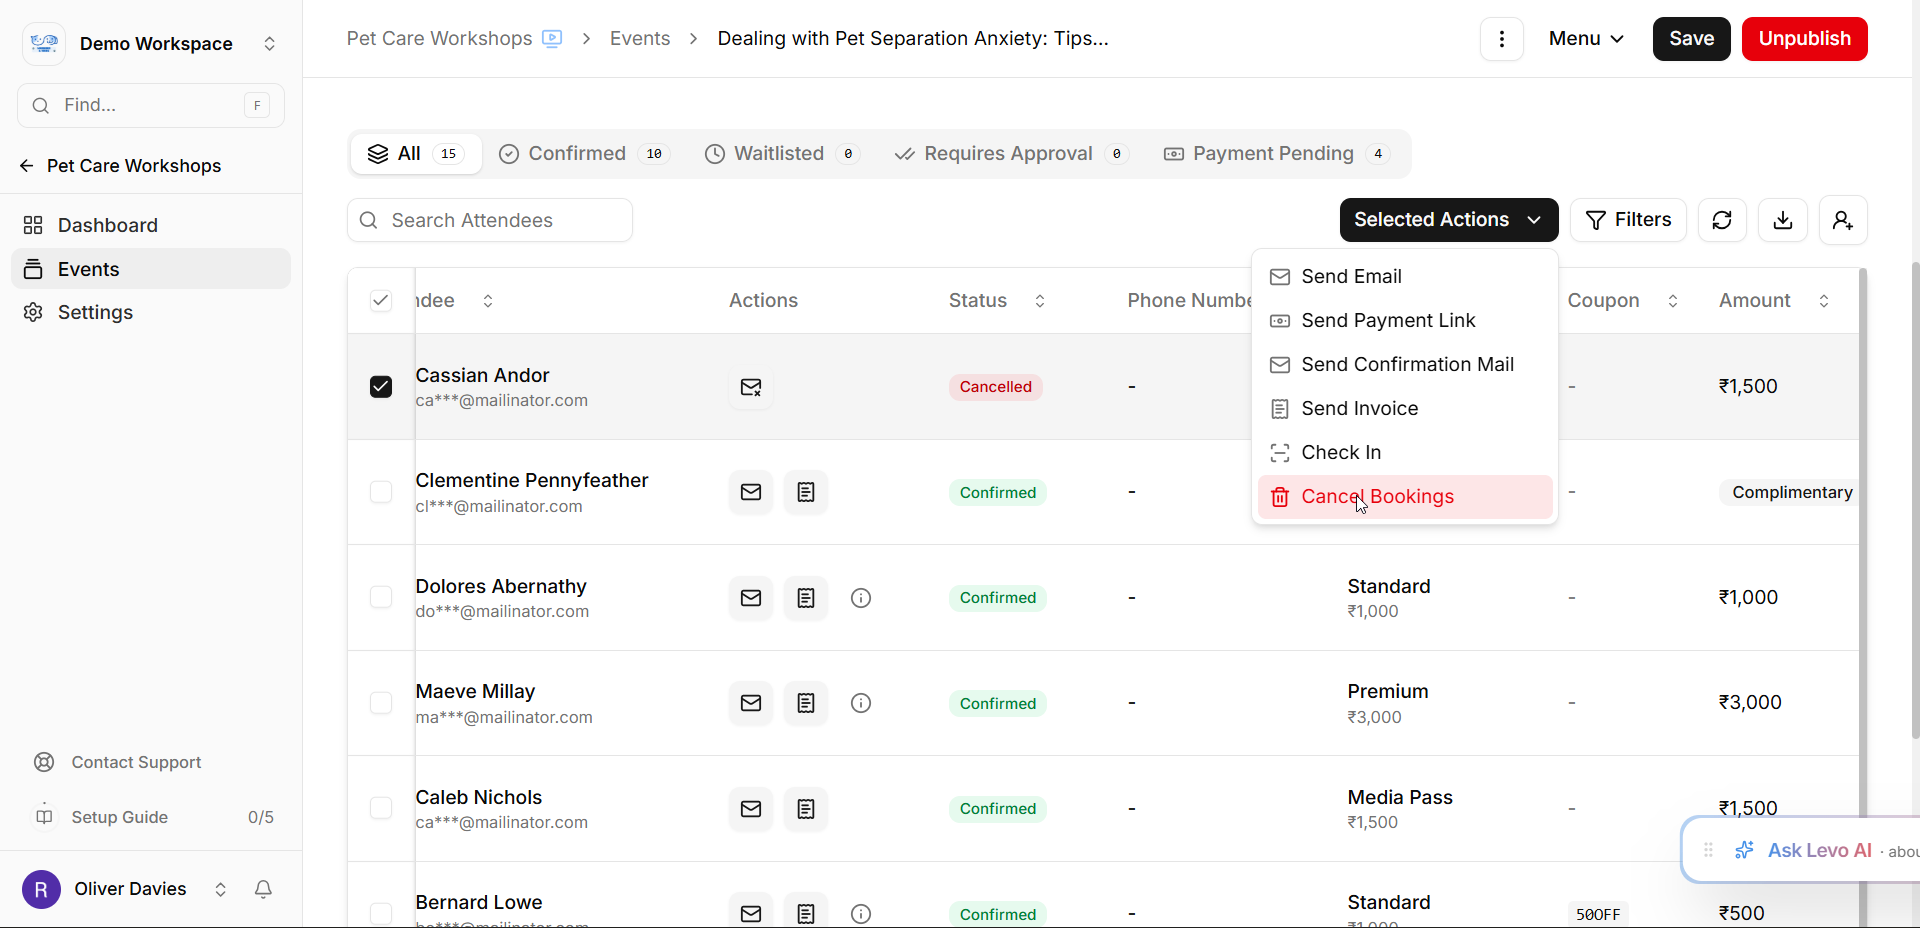
Select Cancel Bookings.
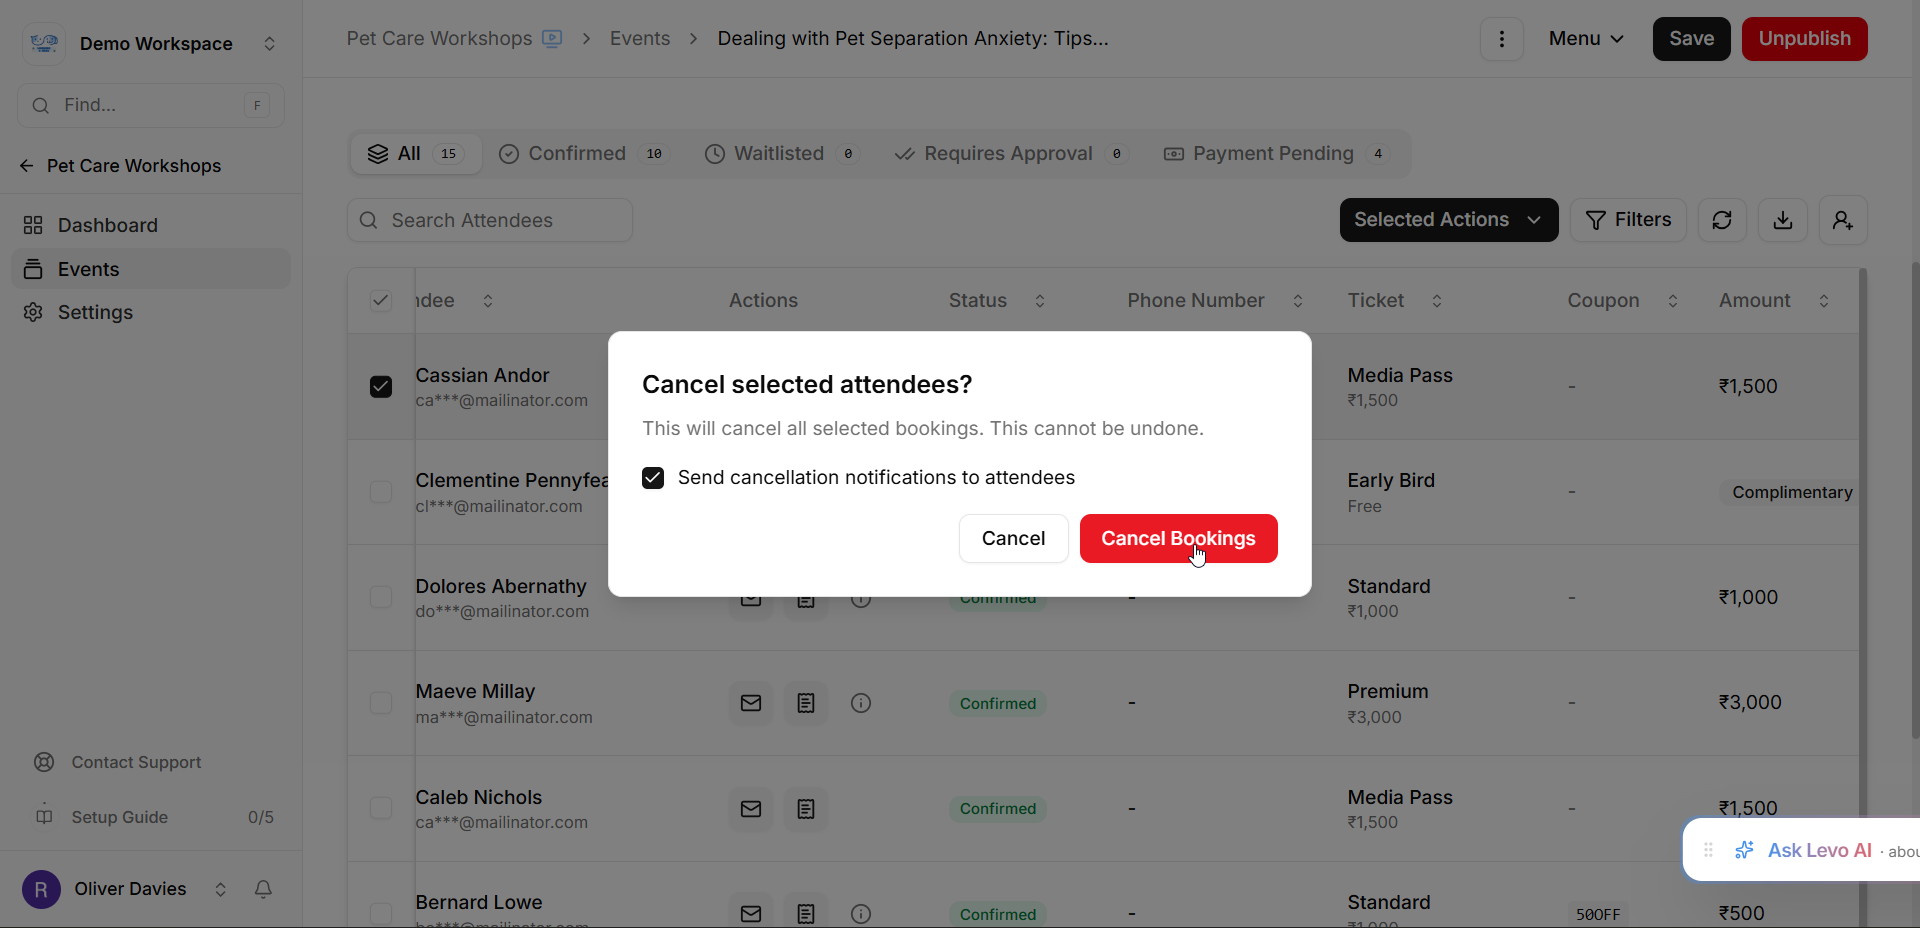
In the confirmation dialog, choose whether to send cancellation notification emails to the attendees, and then click Cancel Bookings.