
How to use Blog Editor Elements
Table of Contents
Think of a blog post as a collection of different elements working together. Each element helps you present your content in a different way, making it easier for readers to scan, understand, and interact with your blog.
The Blog Editor gives you all these elements in one place. By choosing the right element for the right purpose, you can create blog posts that are well-structured, engaging, and easy to read.
Where to find Blog Elements
You can find blog elements in the Blog Editor.
Once the Blog Editor opens, place your cursor on an empty line.
Type / or click the + icon to open the list of available elements.
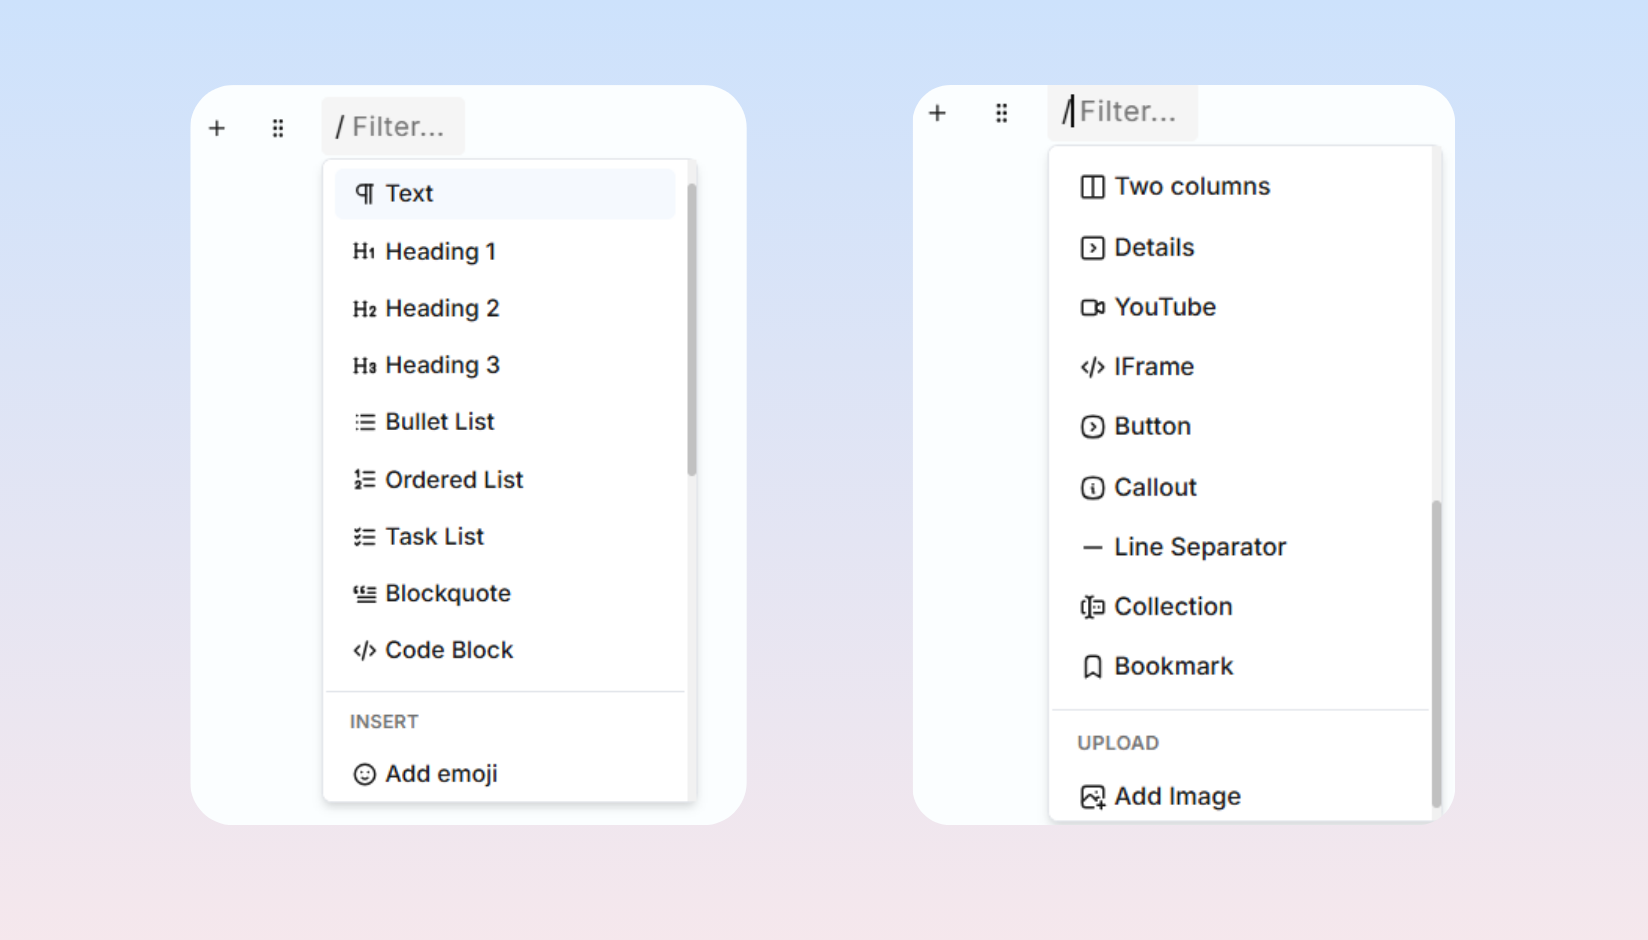
What You Can Add in the Blog Editor
1. Text
The Text element is used to write paragraphs and is the default element in the Blog Editor. Every new line you create automatically starts as a Text element.
You can simply start typing on an empty line, or type / and select Text from the element menu.
Use the formatting toolbar to style your text with options such as Bold, Italic, Highlight, Links, and more.
2. Heading
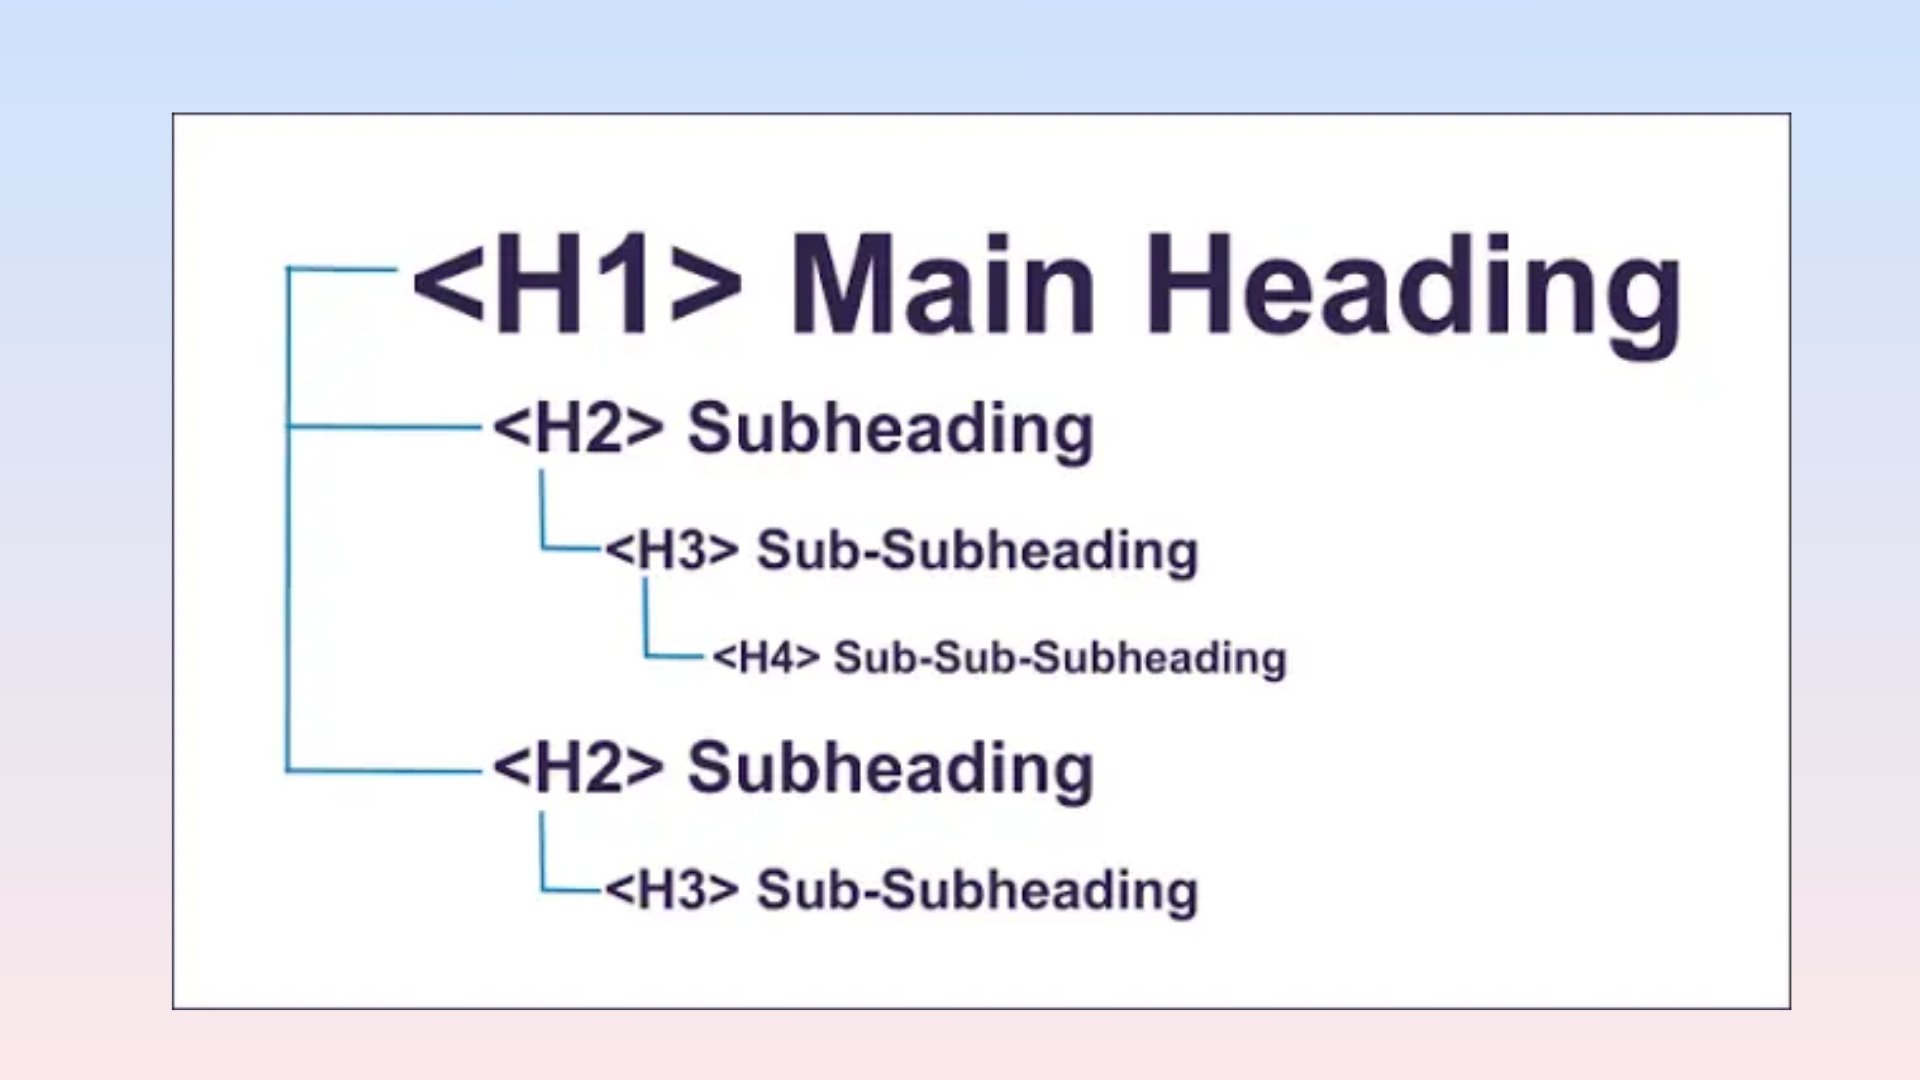
Headings help organize your blog into clear sections, making it easier for readers to scan your content. They also improve SEO by helping search engines understand the structure of your page.
a) Heading 1 (H1)
H1 is the largest heading and represents the main topic of your page. It is the most important heading for SEO and should clearly describe what your blog is about.
Best Practice: Use only one H1 per page whenever possible. This helps both readers and search engines understand the primary topic of your content.
b) Heading 2 (H2)
Use H2 to divide your blog into major sections, such as Introduction, Features, Benefits, or FAQs.
c) Heading 3 (H3)
Use H3 to break a H2 section into smaller topics. This makes longer sections easier to read and keeps your content well organized.
You can also use H4, H5, and H6 by changing the heading level. Use headings in order of importance (H1 → H6) to keep your content well organized and easy to follow.
3. Lists
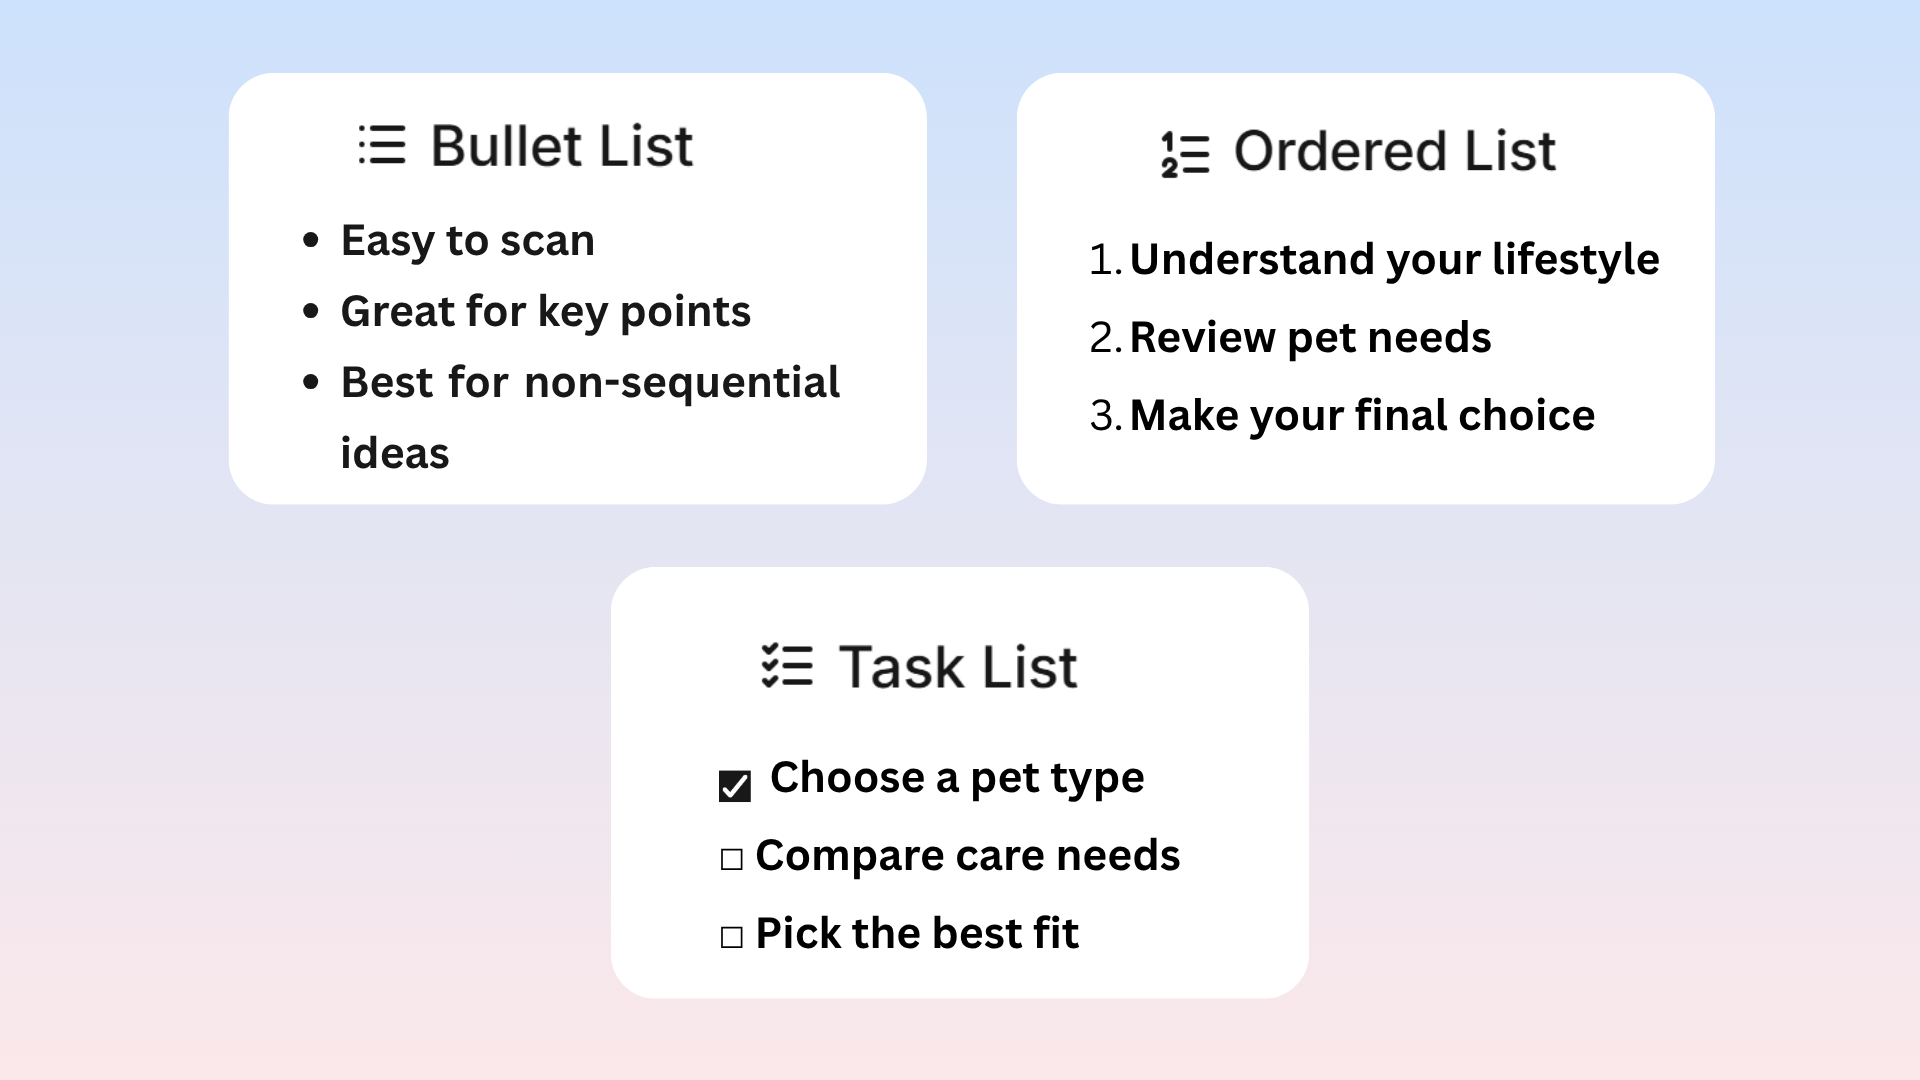
Use Lists to present information in a structured and organized way. They make your content easier to scan and understand, whether you're listing features, outlining steps, or creating a checklist.
a) Bullet List
Use a Bullet List to present information where the order of items doesn't matter. It's ideal for features, benefits, tips, or key point Keep each bullet short and focused.
Press Tab to create a nested list, or press Enter twice to end the list.
b) Ordered List
Use an Ordered List when the order of items is important, such as step-by- step instructions, processes, or rankings.The editor automatically numbers each item and updates the numbering if you rearrange the list.
Press Tab to create a nested list, or press Enter twice to end the list.
c) Task List
A Task List lets you create a checklist with interactive checkboxes, making it ideal for tutorials, to-do lists, or step-by-step guides.
4. Blockquote
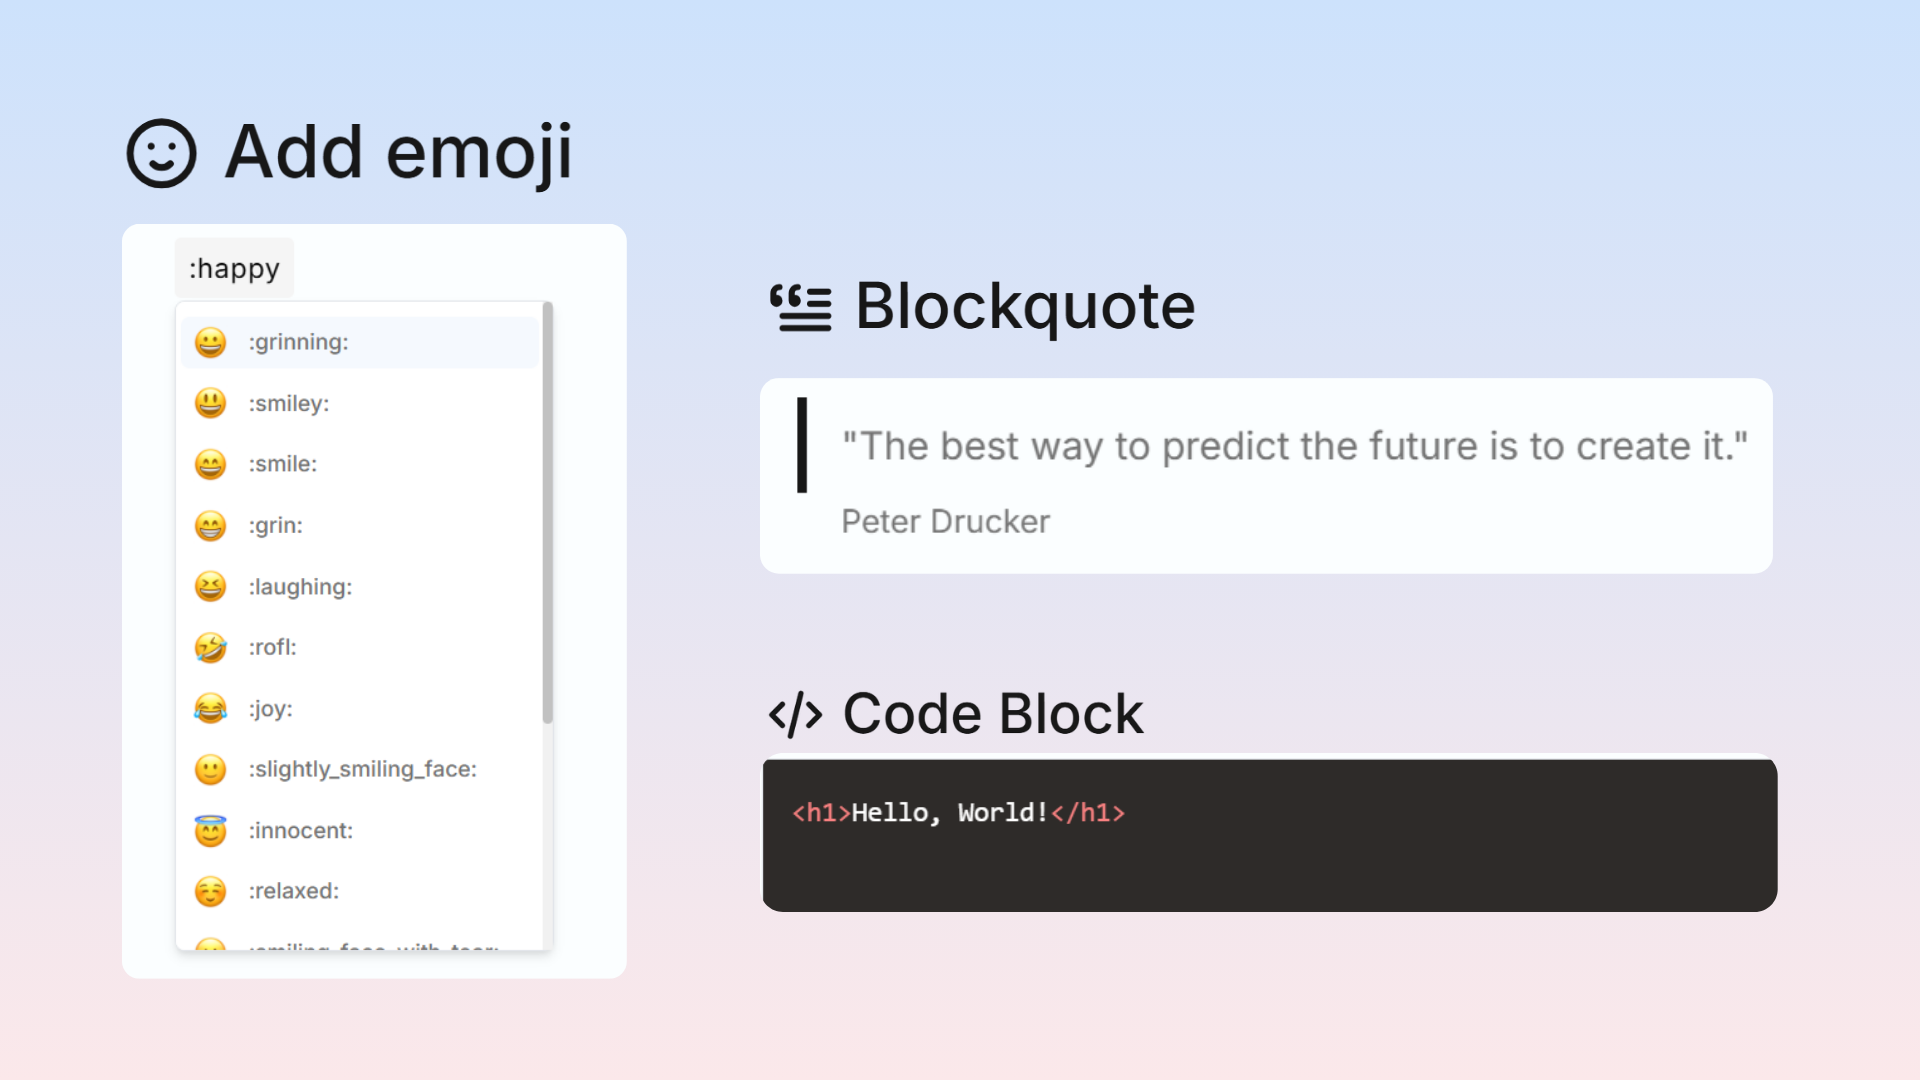
Use a Blockquote to highlight important text or quotations, making them stand out from the rest of your content.
Tip: Use blockquotes for testimonials, expert quotes, or key takeaways. Avoid using too many in a single post to keep them impactful.
5. Code Block
Use a Code Block to display code snippets with syntax highlighting. It's ideal for technical tutorials, configuration guides, terminal commands, and API examples.
To add a Code Block, type / and select Code Block .Then, choose the programming language to enable syntax highlighting.
Tip: Select the correct programming language to make your code easier to read. For short code snippets within a sentence, use Inline Code in a Text element instead.
6. Add Emoji 

Use the Add Emoji element to insert emojis into your content. Emojis can help highlight important information, make headings stand out, or add personality to your blog.
Place your cursor where you want the emoji, type /, and select Add Emoji.
You can also search for an emoji by typing : followed by its name.
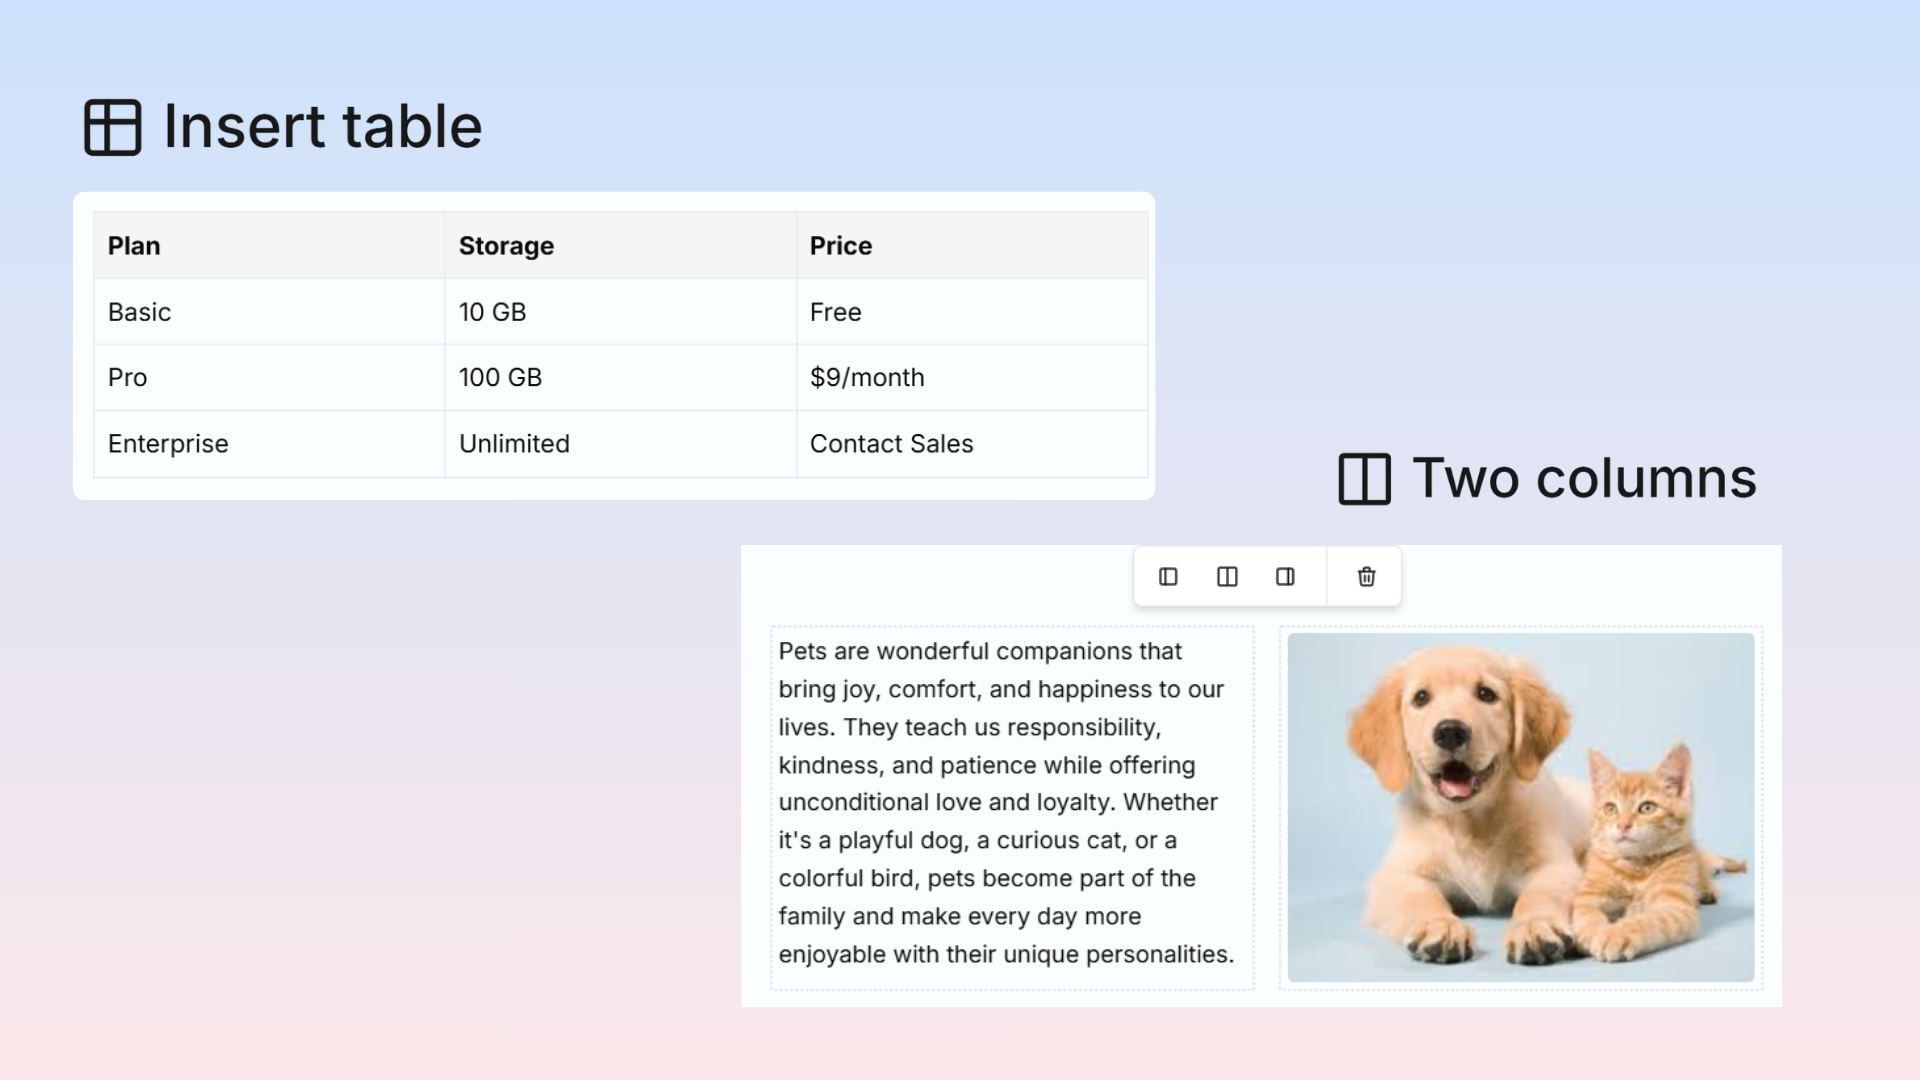
7. Insert Table
Use Insert Table to organize information into rows and columns.
To add a table, type / and select Insert Table. Then choose the number of rows and columns, and click any cell to start entering content.
8. Two Columns
Use Two Columns to display content side by side. Each column can contain text, images, headings, lists, or other elements.
Tip: Two Columns work well for comparisons, image-and-text layouts, or presenting related information side by side. On smaller screens, the columns automatically stack vertically for better readability.
9. Details
Use the Details element to create expandable sections that readers can open when needed. It's useful for FAQs, additional information, technical details, or optional content.
To add a Details element, type / and select Details. Enter a title in the summary field, then add the content you want to display when the section is expanded.
Tip: Use a clear title so readers know what the section contains before expanding it. Avoid hiding important information that should be visible immediately.
Open the Blog Editor, review your content, and click Publish when you're ready.
10. YouTube
Use the YouTube element to embed a YouTube video directly into your blog. Readers can watch the video without leaving the page.
To add a YouTube video, type / and select YouTube, then paste the video URL. Both standard YouTube and youtu.be links are supported.
Tip: Add a short description before or after the video to give readers context about what they're watching.
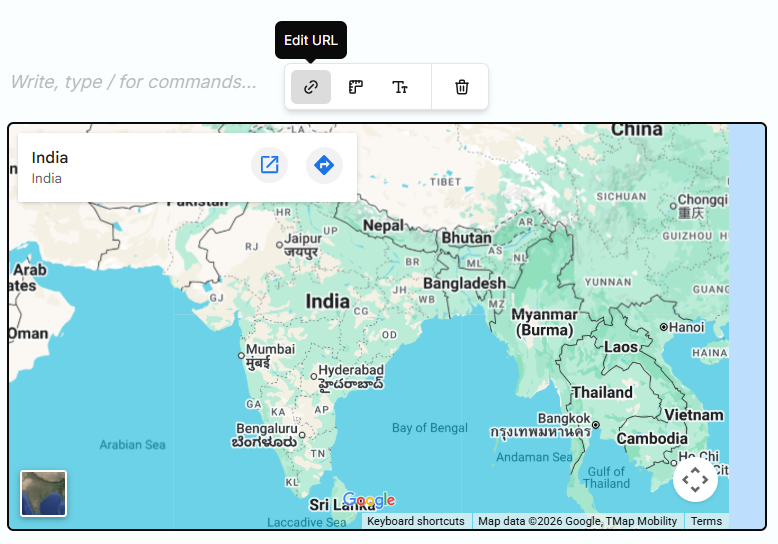
11. IFrame
Use the IFrame element to embed content from supported websites directly into your blog. It's useful for adding Google Maps, Google Forms, Calendly, Spotify playlists, Figma files, and other interactive content.
To add an IFrame, type / and select IFrame, then paste the website's embed URL.
You can also configure:
Embed URL: Edit or update the embedded content.
Dimensions: Set the width and height of the embed.
Title: Add a title to improve accessibility.
Tip: Some websites don't support embedding. If the content doesn't appear, make sure you're using the website's embed URL instead of a regular page link.
12. Button
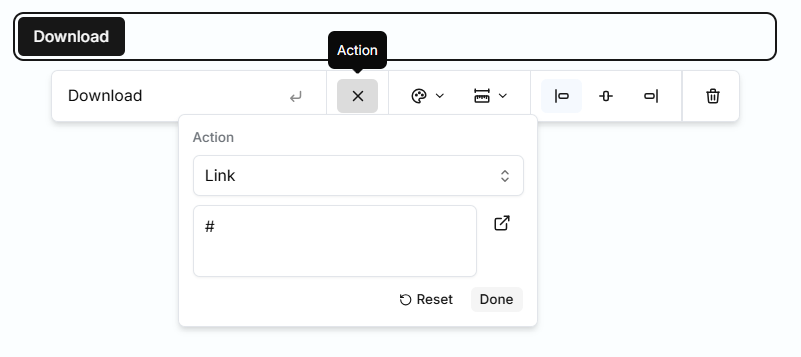
Use the Button element to add a clear call-to-action that directs readers to another page or website.
To add a Button, type / and select Button. Then enter the button text, add the destination URL, and customize its appearance.
You can also configure:
Style : Primary, Secondary, Outline
Size : Small , Medium , Large
Alignment: Left , Center , Right
13. Callout
Use a Callout to highlight important information in a visually distinct box. It's ideal for tips, warnings, important notes, or best practices.
To add a Callout, type / and select Callout. Then enter your message and choose an emoji that matches the type of information. You can also add Background color & Text Color of your choice.
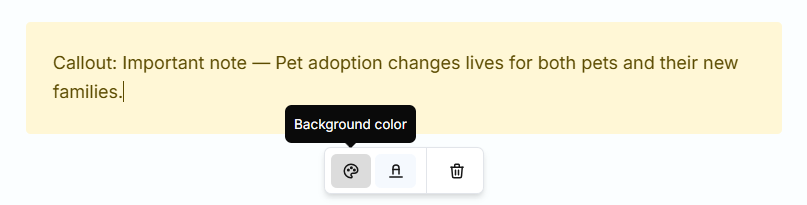
Tip: Use callouts only for information that needs extra attention. Too many callouts can make your content harder to scan.
14. Line Separator
Use the Line Separator element to add a visual break between sections of your blog. It helps separate different topics and improves readability in longer posts.
Tip: Use line separators only when you need a clear visual break. In most cases, headings are enough to organize your content.
15. Collection
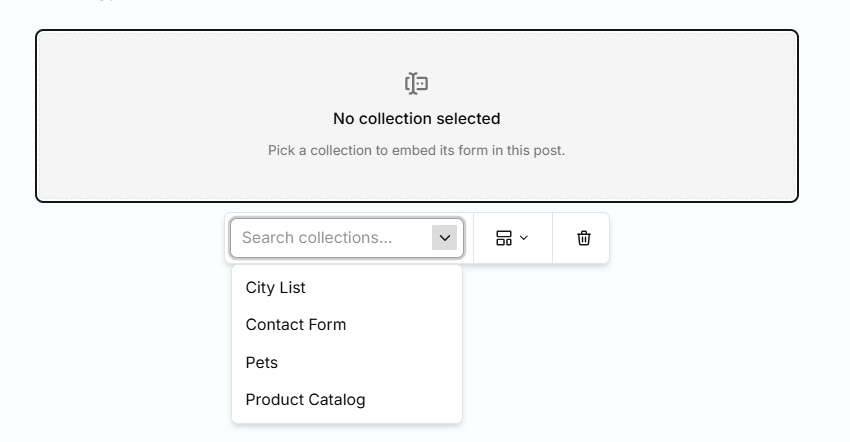
Use the Collection element to display an existing Levo Collection inside your blog. It's ideal for showcasing products, events, team members, testimonials, or other structured content.
To add a Collection, type / and select Collection, then choose the collection you want to display. You can set different Layouts : Classic , Multi-Step, One at a time or Conversational Steps .
Tip: Any changes you make to the collection are automatically reflected wherever it's embedded. Make sure the collection is created before adding it to your blog.
16. Bookmark
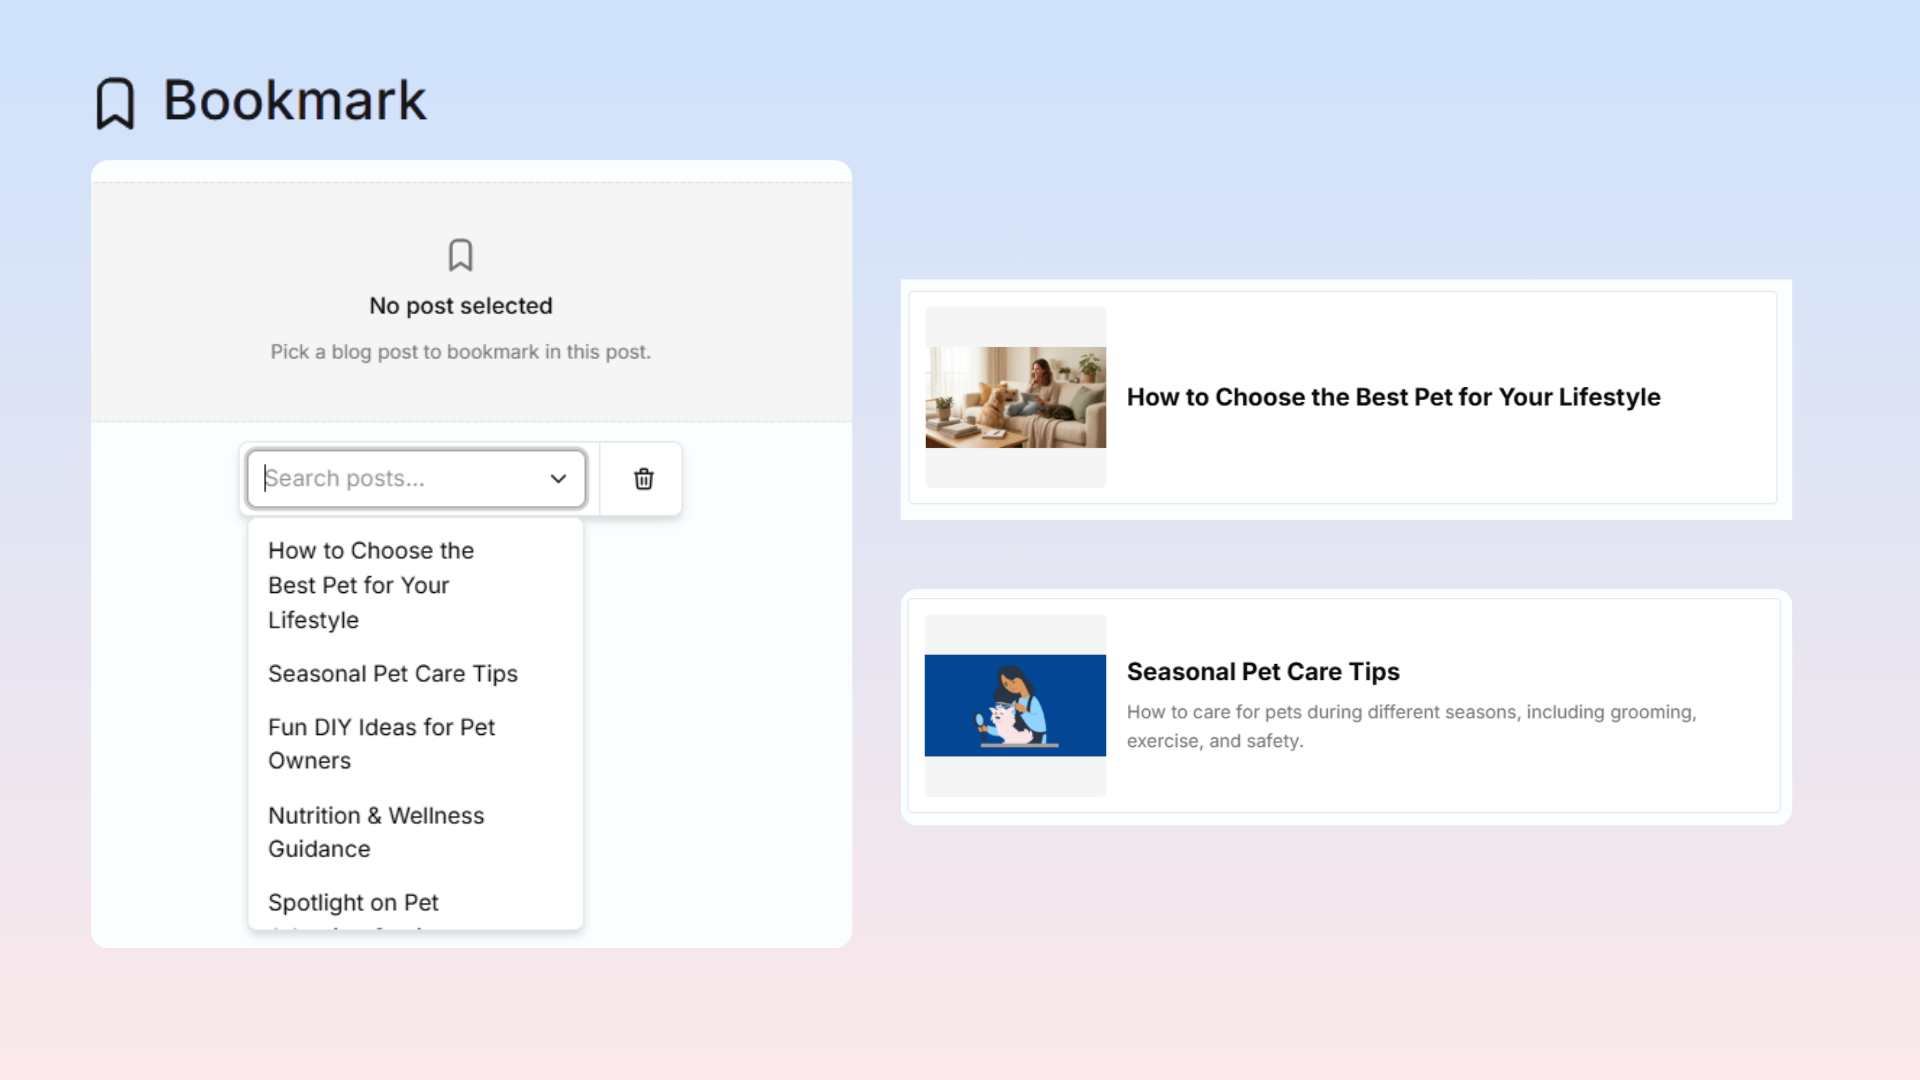
Use the Bookmark element to display a preview of another blog post. The preview automatically includes the post's cover image, title, and summary, making it easy to guide readers to related content.
To add a Bookmark, type / and select Bookmark, then search for and select the blog post you want to display.
Tip: Bookmark previews update automatically if the linked post's title, summary, or cover image changes. Make sure the linked post is published and has a cover image and summary for the best appearance.
17. Add Image
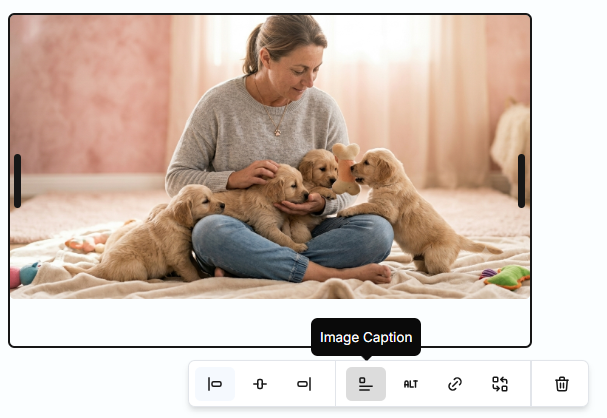
Use the Add Image element to upload and display images in your blog.
To add an image, type / and select Add Image, then choose an image from your device. You can also drag and drop an image directly into the editor.
You can also configure:
Alignment: Left, Center, or Right
Image Caption: Add a caption below the image for context.
Alt Text: Describe the image to improve accessibility and SEO.
Image Link: Make the image clickable by linking it to another page or website.
Supported formats: PNG, JPG, JPEG, GIF, WebPage, and SVG.
Tip: Add Alt Text to improve accessibility and SEO. Use a caption when additional context helps readers understand the image.